Hey yo, I'm Reese! I'm just a dude who always loved playing video games and making my own characters, such as my main OC Reese Riverson (And many others!). I'm into home audio, home theater, video, and modern and retro computers as well! I've gotten into DIY for my audio needs, such as my custom subwoofer and speaker builds.
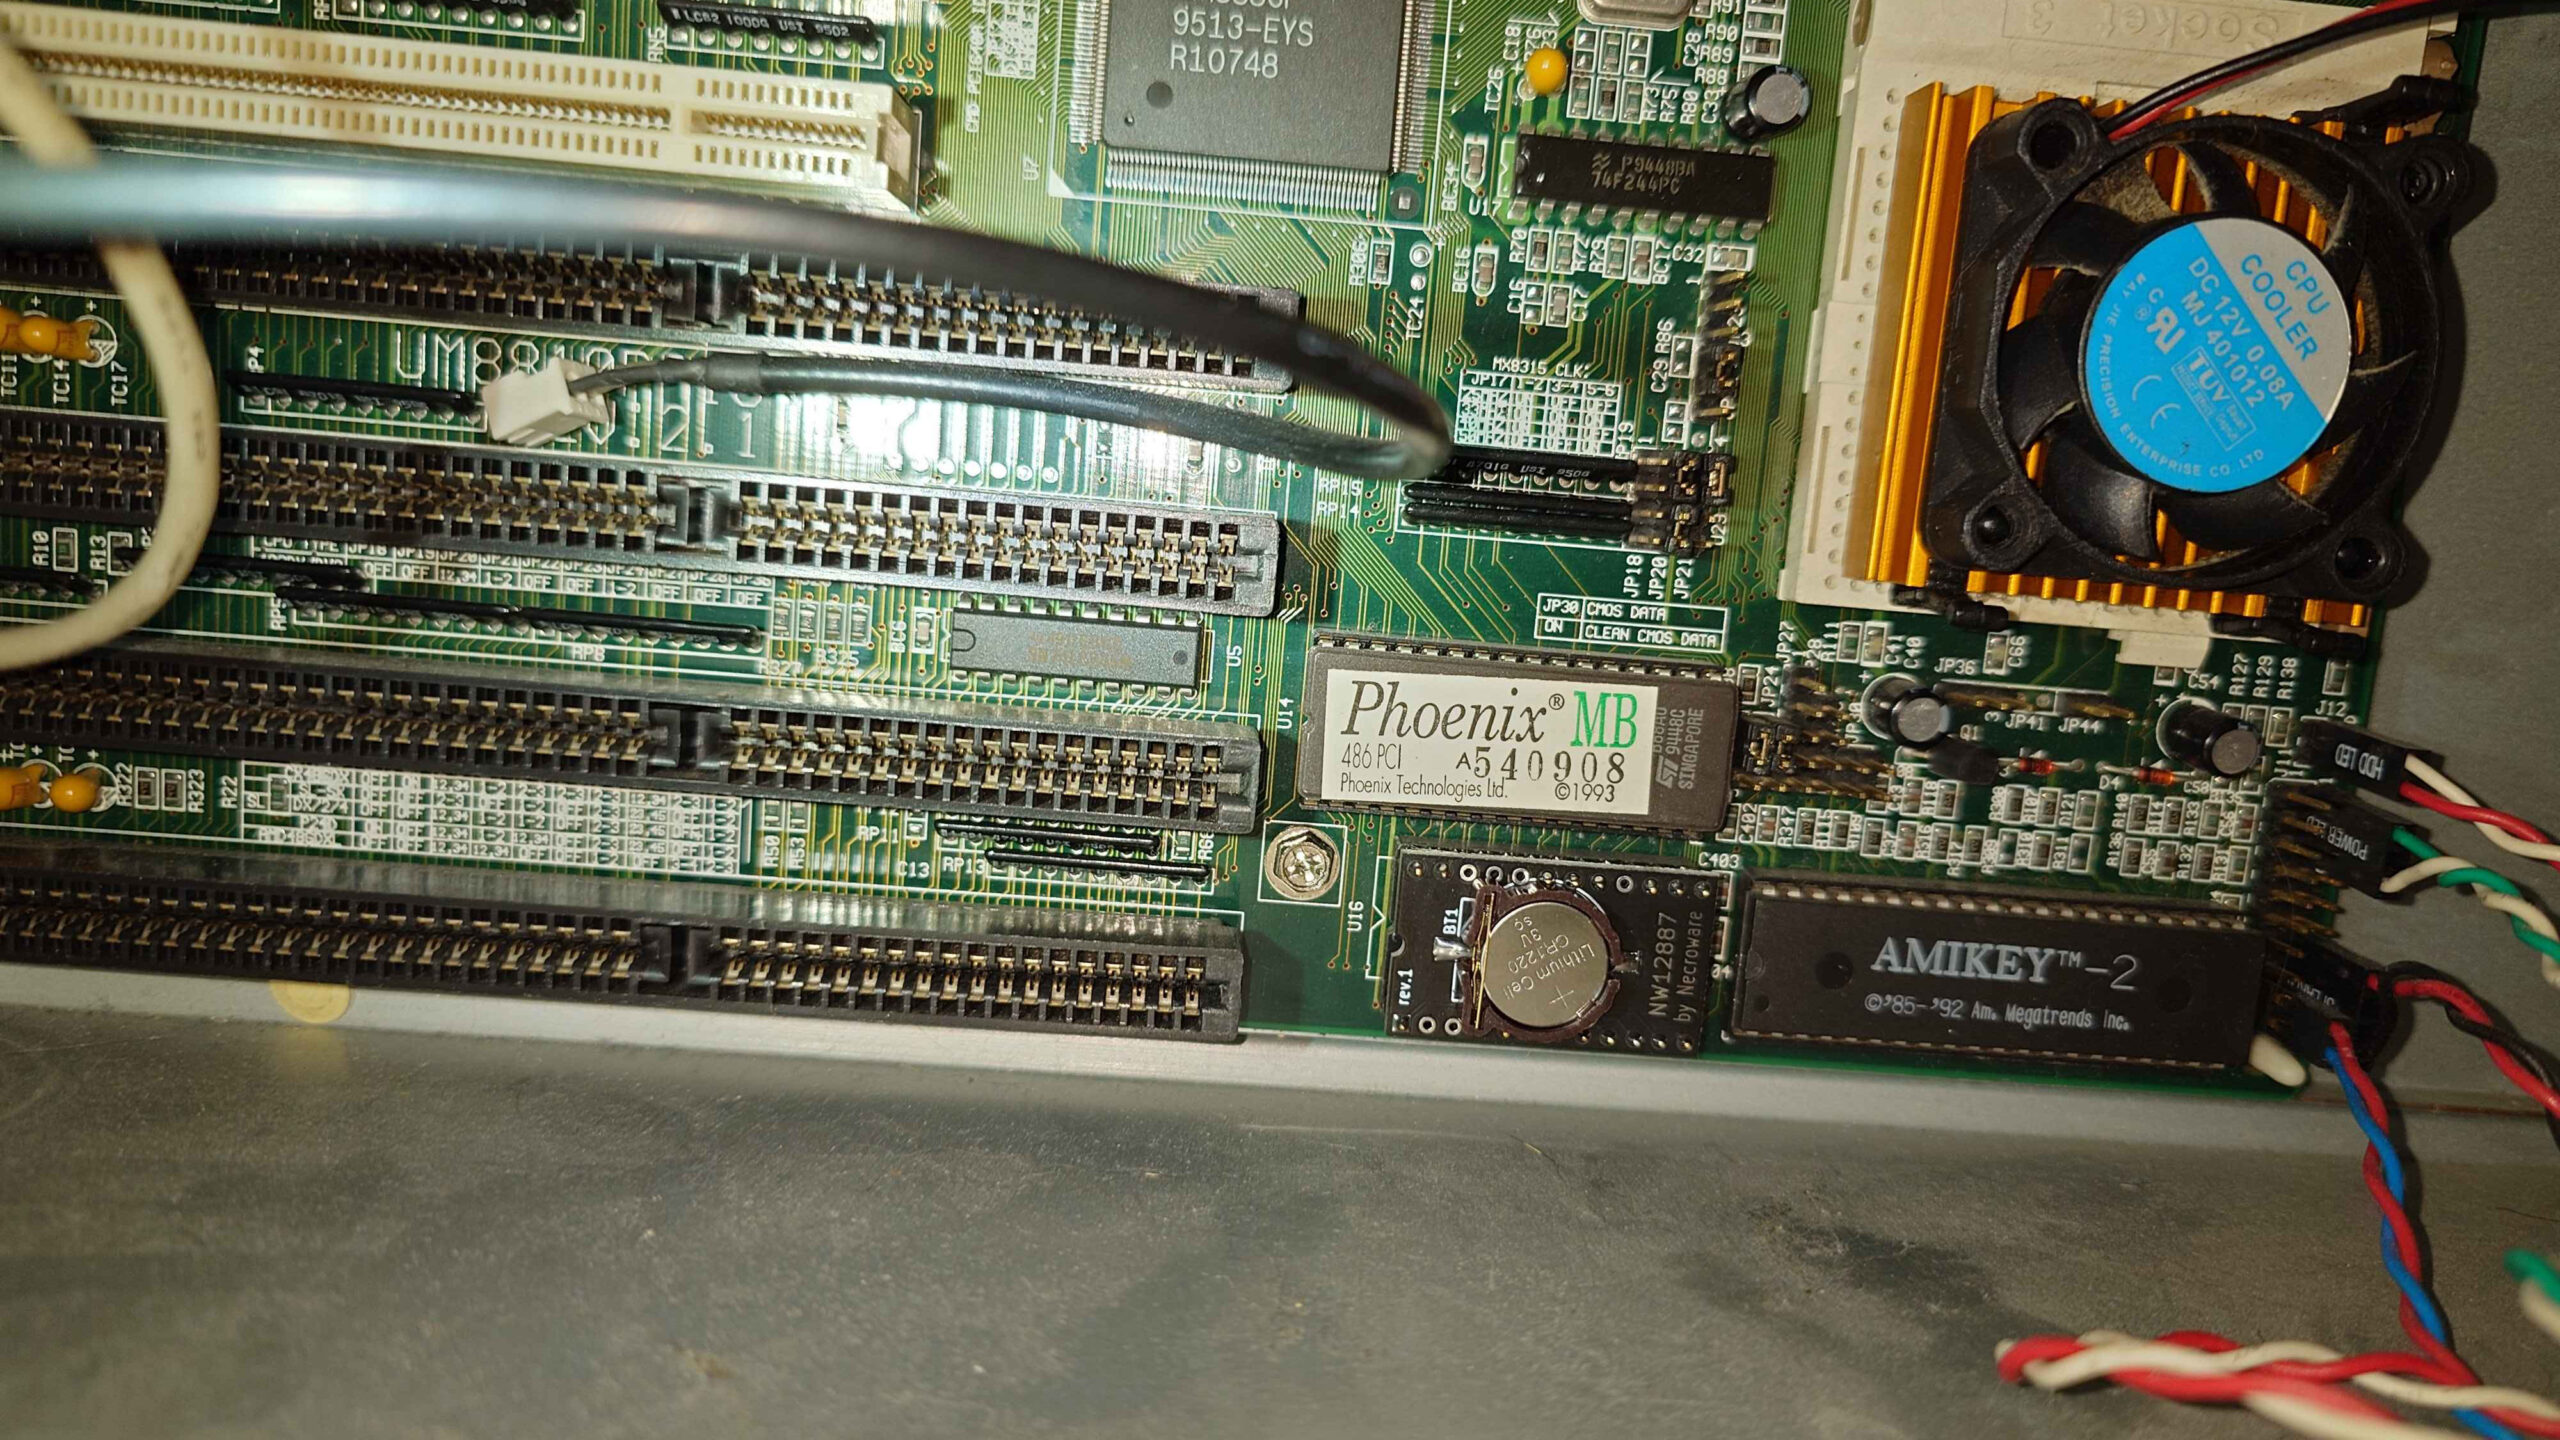
The DALLAS RTC battery finally was done for, on the 486 system that I rebuilt back in 2013. I’ve modified these before, to use an external battery solution, but I really didn’t want to deal with that again, so I decided to go for a modern replacement solution for the DS12887 Dallas RTC chip.
This specific solution is Necroware’s NW12887 RTC module which was fortunately available on eBay, which I picked mine up from this seller for this system. The installation went quite smoothly, since the RTC module was already socketed on the Elitegroup Computer Systems UM8810P-AIO motherboard.
Once I assembled the machine, putting the AWE64 Gold back in, I plugged it all in and I was able to re-configure the BIOS and finally boot into the system successfully!
I’m glad it all worked out in the end, the only other thing I needed to address was the faulty 2GB Compact Flash card, but I kept a backup of these things on my storage server anyway, so it was easy to restore on a new card and get going fully!
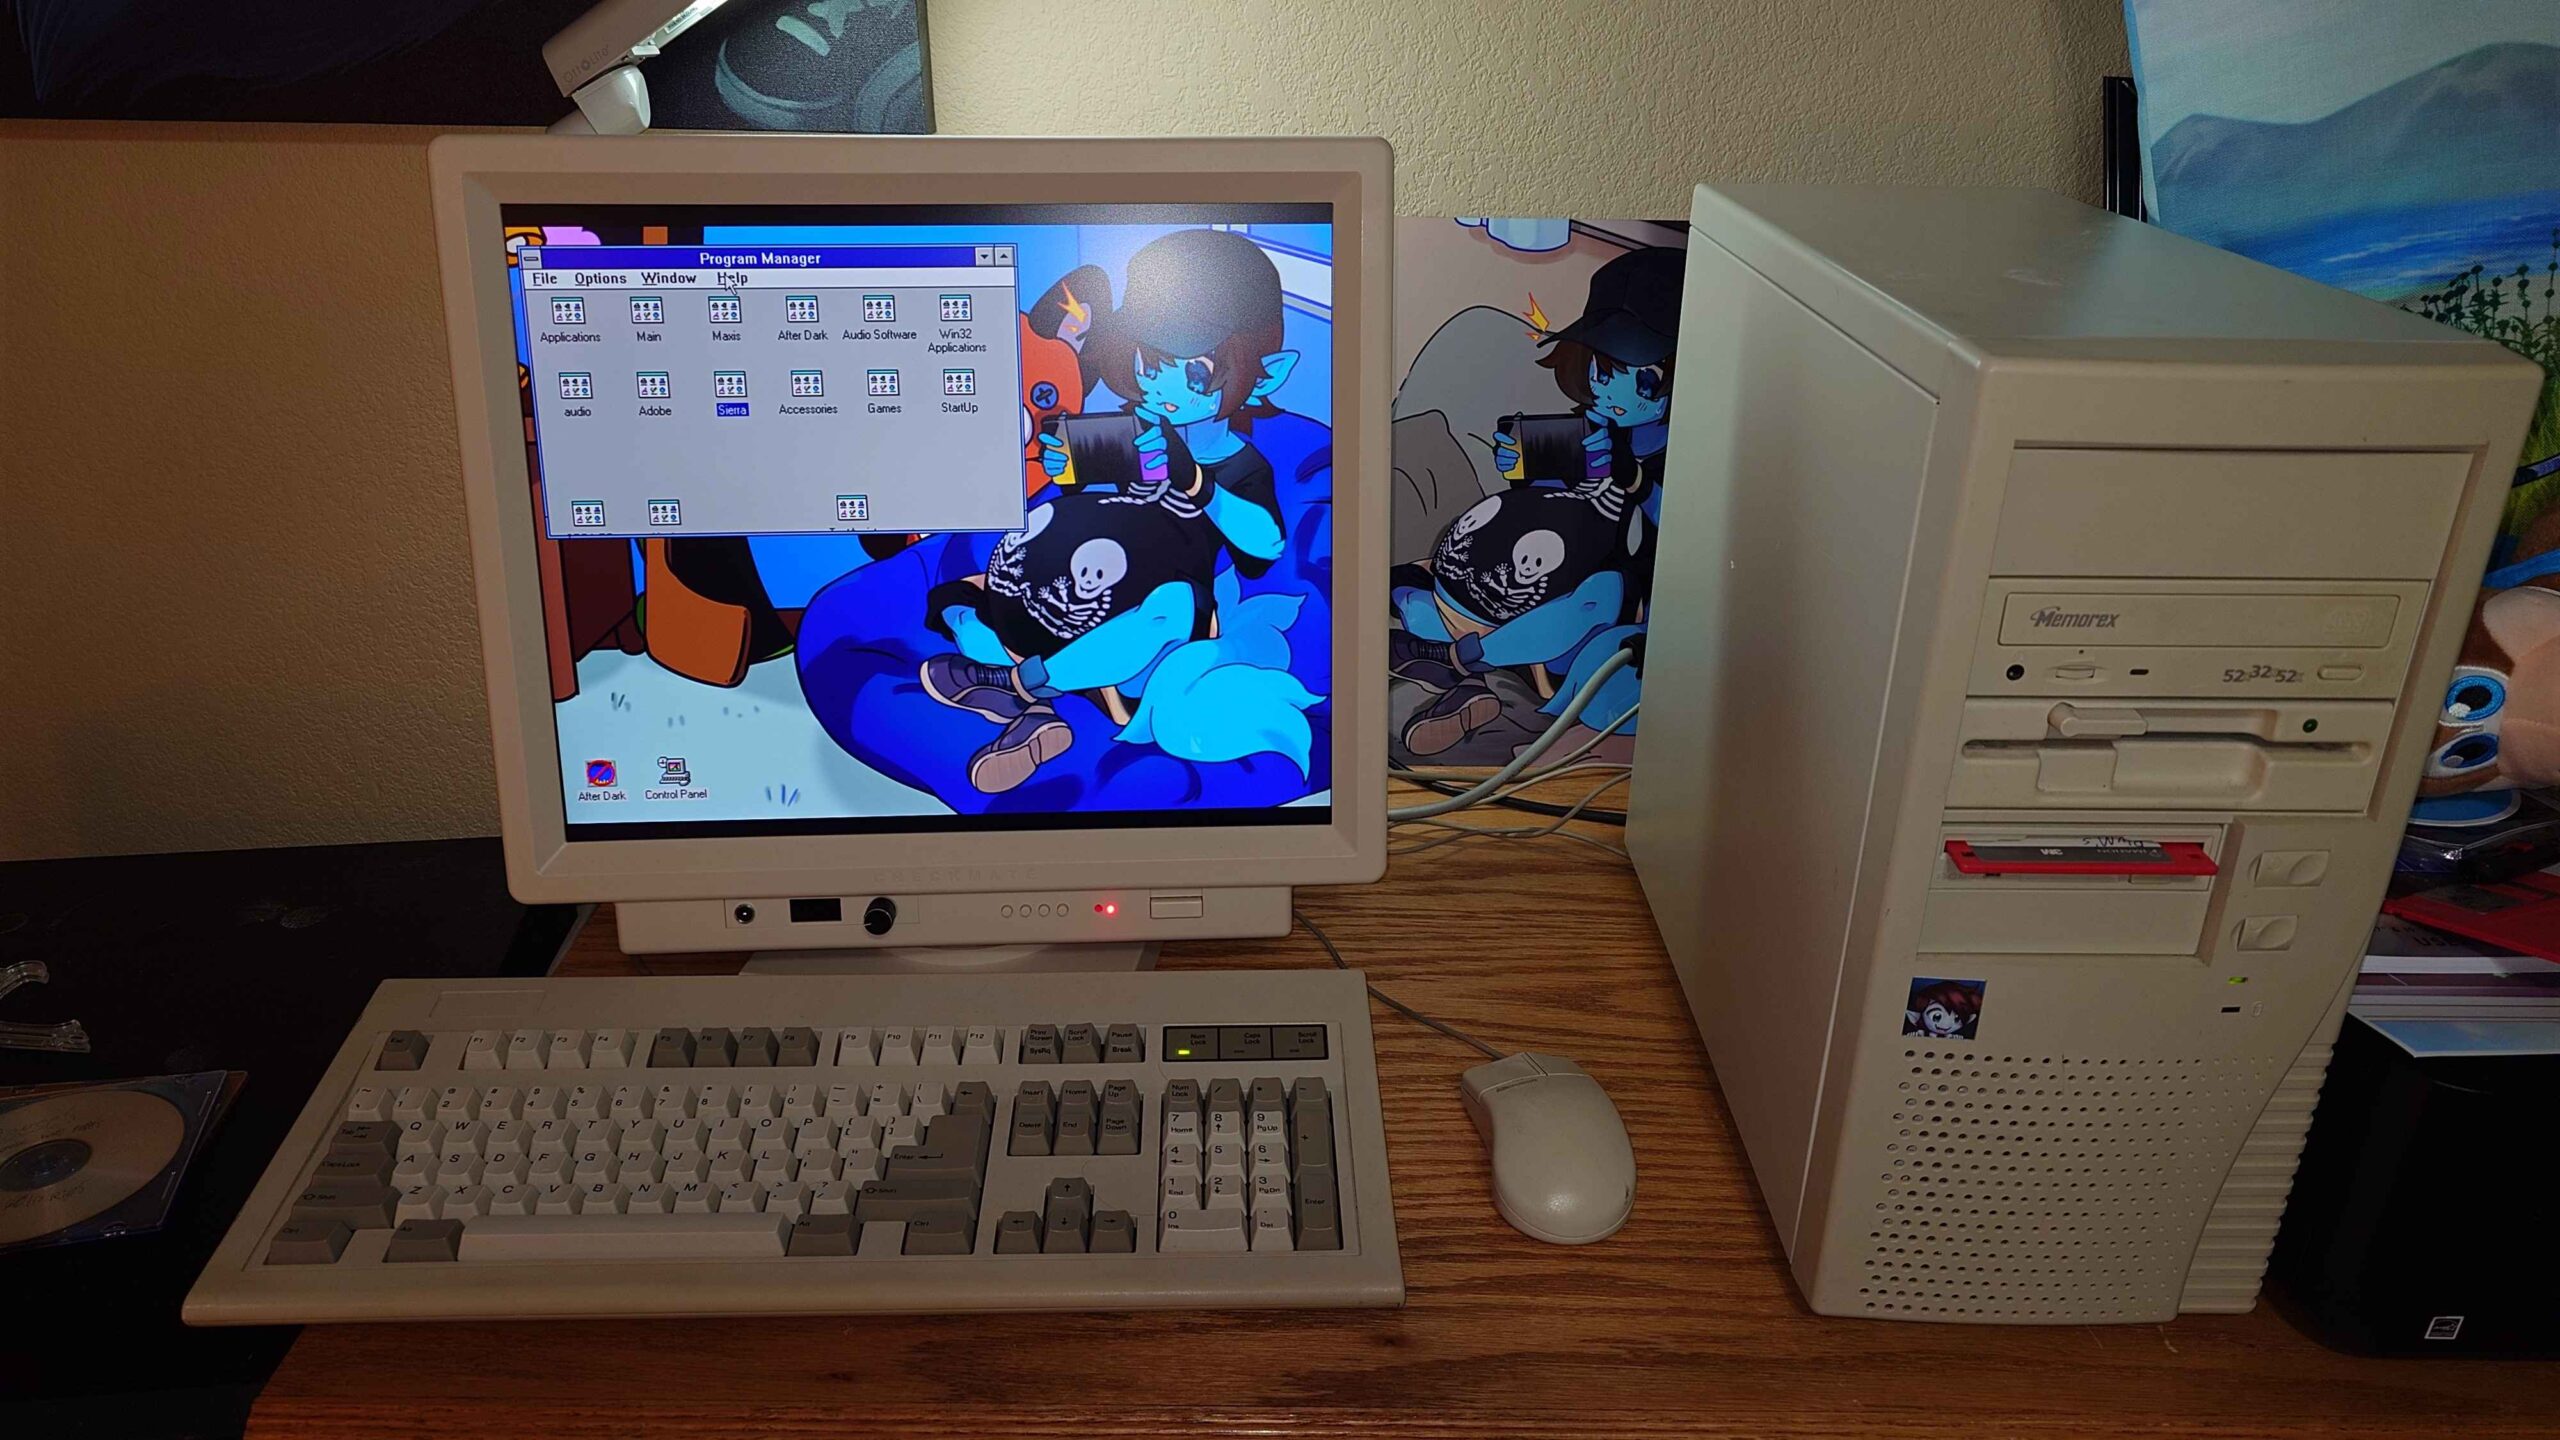
I’ve received my Checkmate Retro Monitor from their Kickstarter campaign a good while back, but I haven’t had the chance to really open this until now, especially since we’ve gotten some home renovations complete downstairs. Anyway, first impressions are already great! I think Steve did a really great job with this display!
I wanted to test it out with my 486DX4 Overdrive rig with the built-in speakers, with Windows 3.1 running at 800×600 resolution. Other than that I haven’t done a whole lot of testing, but so far so good out of the box.
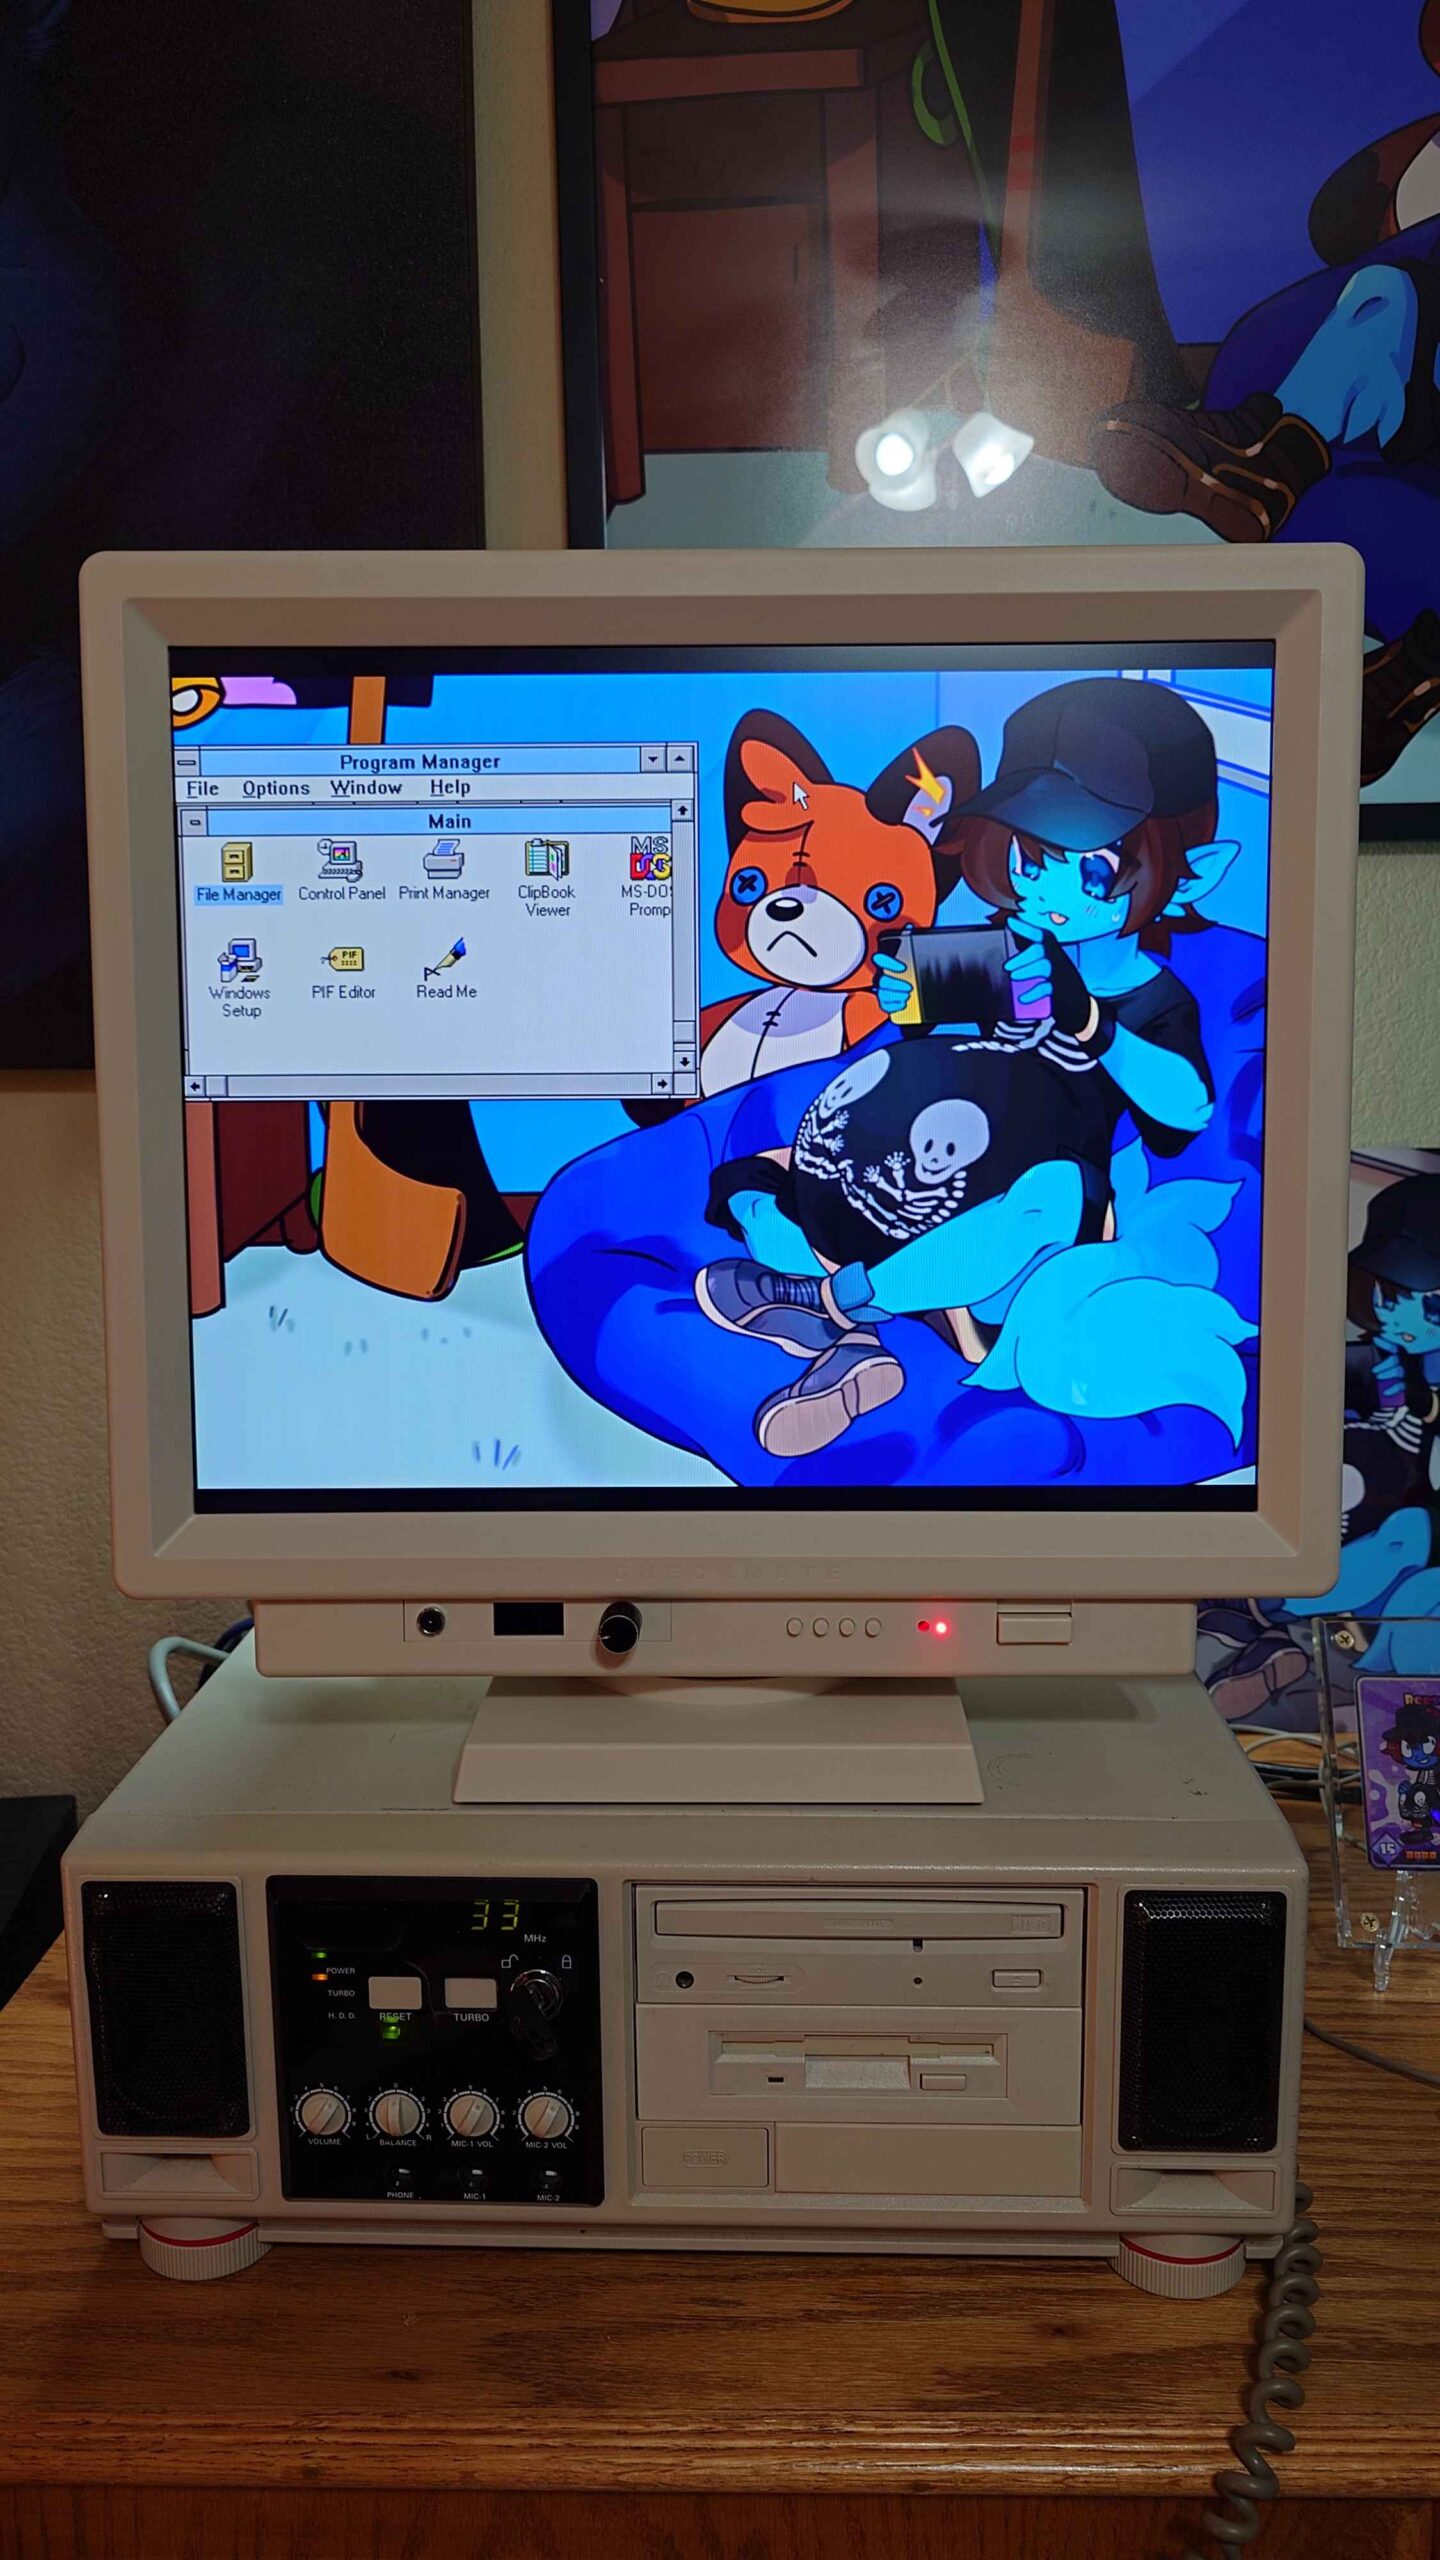
It does look rather aesthetically pleasing, I’m glad I ended up getting this, now here’s the rear I/O on my unit:
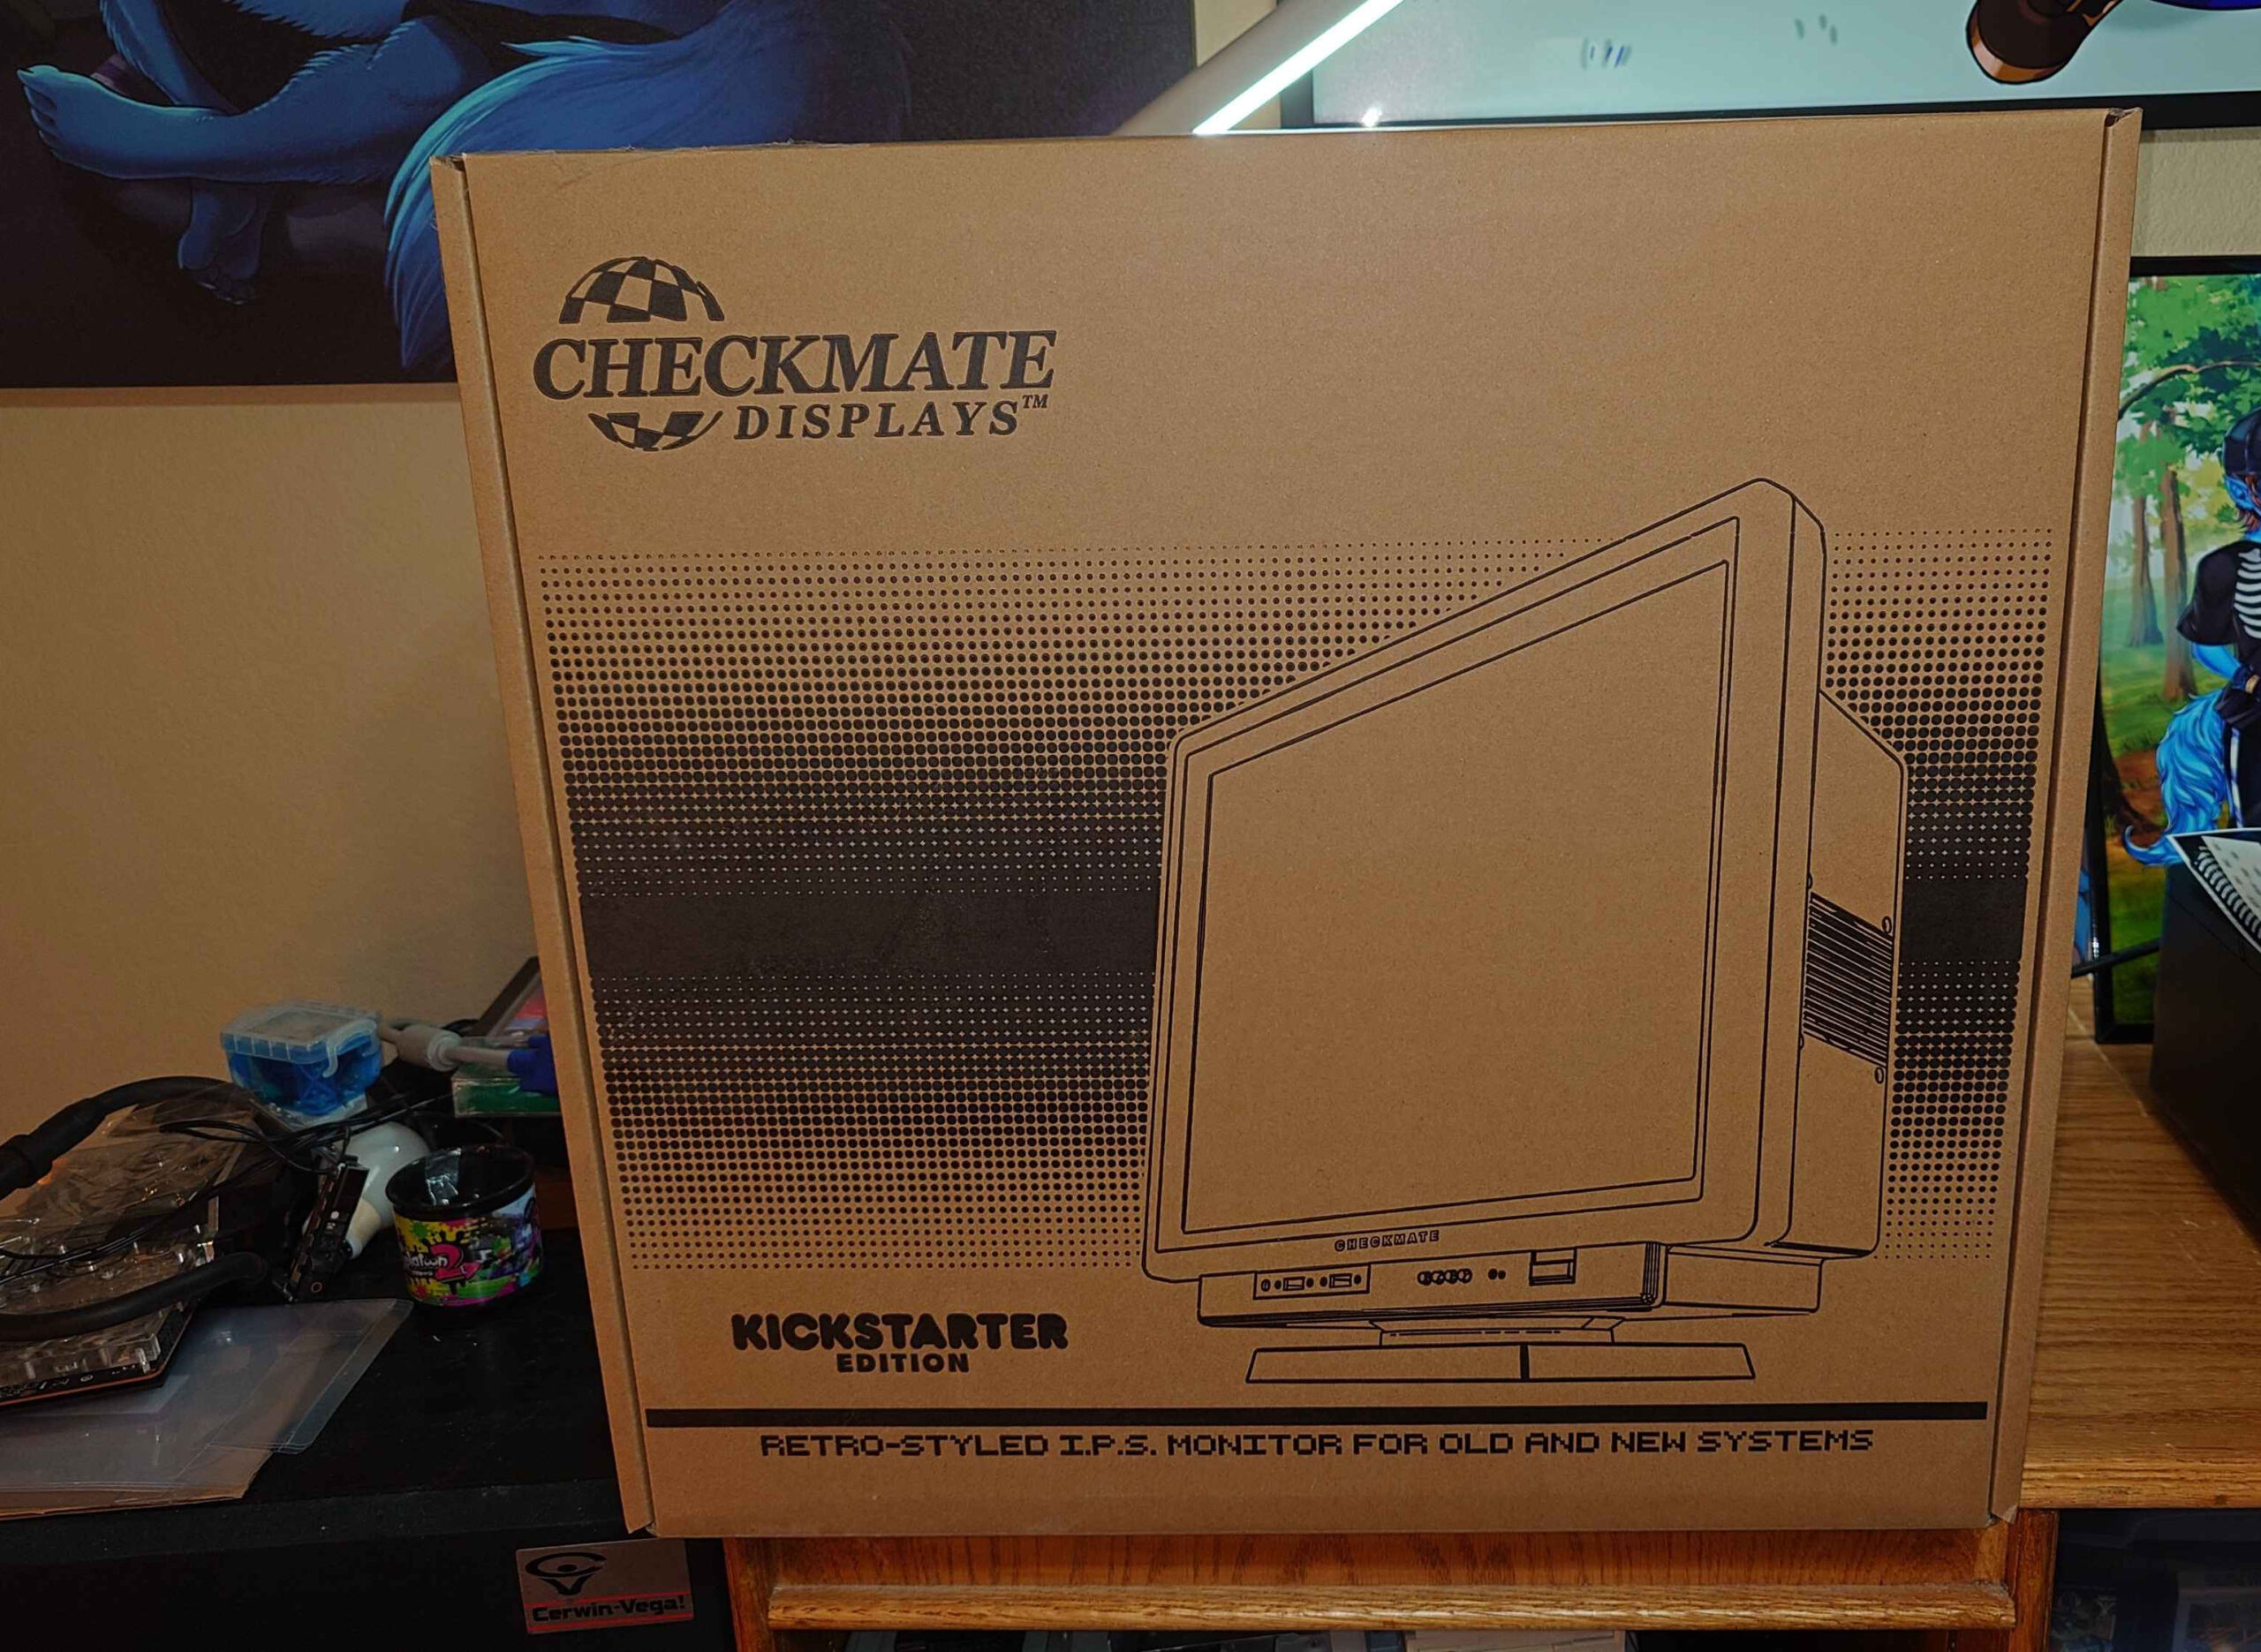
And the box it came in, which was well packaged!
I’ll test the other features it has, apart from the VGA input later. Since I ended up helping my friend PluMGMK by testing his COM program on actual hardware, and I wanted to go ahead and get this unboxed and setup, rather than digging out a CRT monitor.
My nostalgia for my favorite childhood operating system simply grows more, especially when a friend of mine, PluMGMK has developed a Modern Generic SVGA driver for Windows 3.1 on GitHub, allowing you to really push the system to utilize more modern hardware.
Which led to me getting some ideas, which I can thankfully try out in 86Box, which is an emulator of retro x86-based machines, giving you a greater selection than your traditional virtualization software can do. Normally I’ve used DOSBOX for my Windows 3.1 needs on modern hardware to quickly tinker around with it, but it only gets me so far with the graphics hardware it can support.
Plus it simply cannot get me the actual tests I want to perform when I build out the physical machine I want to make for this. As cool it is to be able to emulate the physical hardware with 86Box, I’m still bound to performancelimitations with it, even with my AMD Ryzen 9900X processor.
Anyway! For this I still want to utilize a system with what hardware I can obtain and get that offers the graphical acceleration good ol’ Win 3.x requires to run smoothly, otherwise everything’s rather CPU bound, even with the aforementioned modern graphics driver
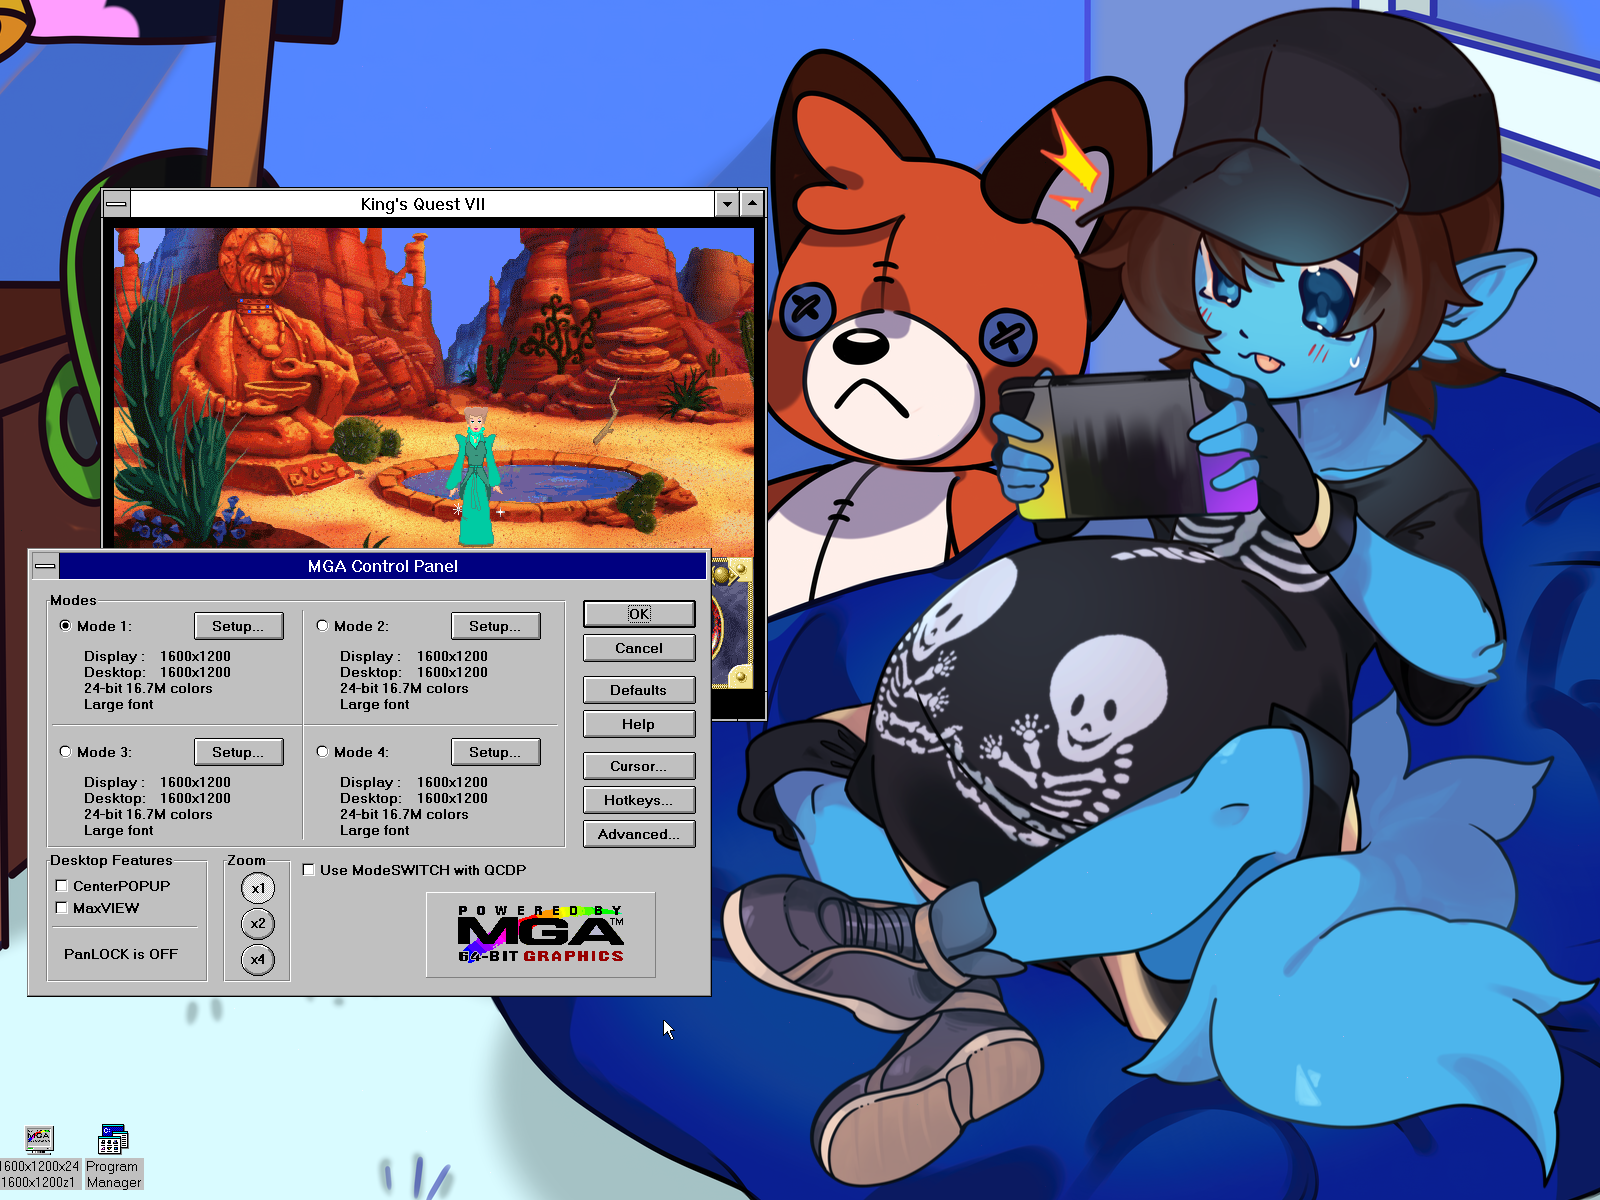
Which brings us to what Matrox has to offer:
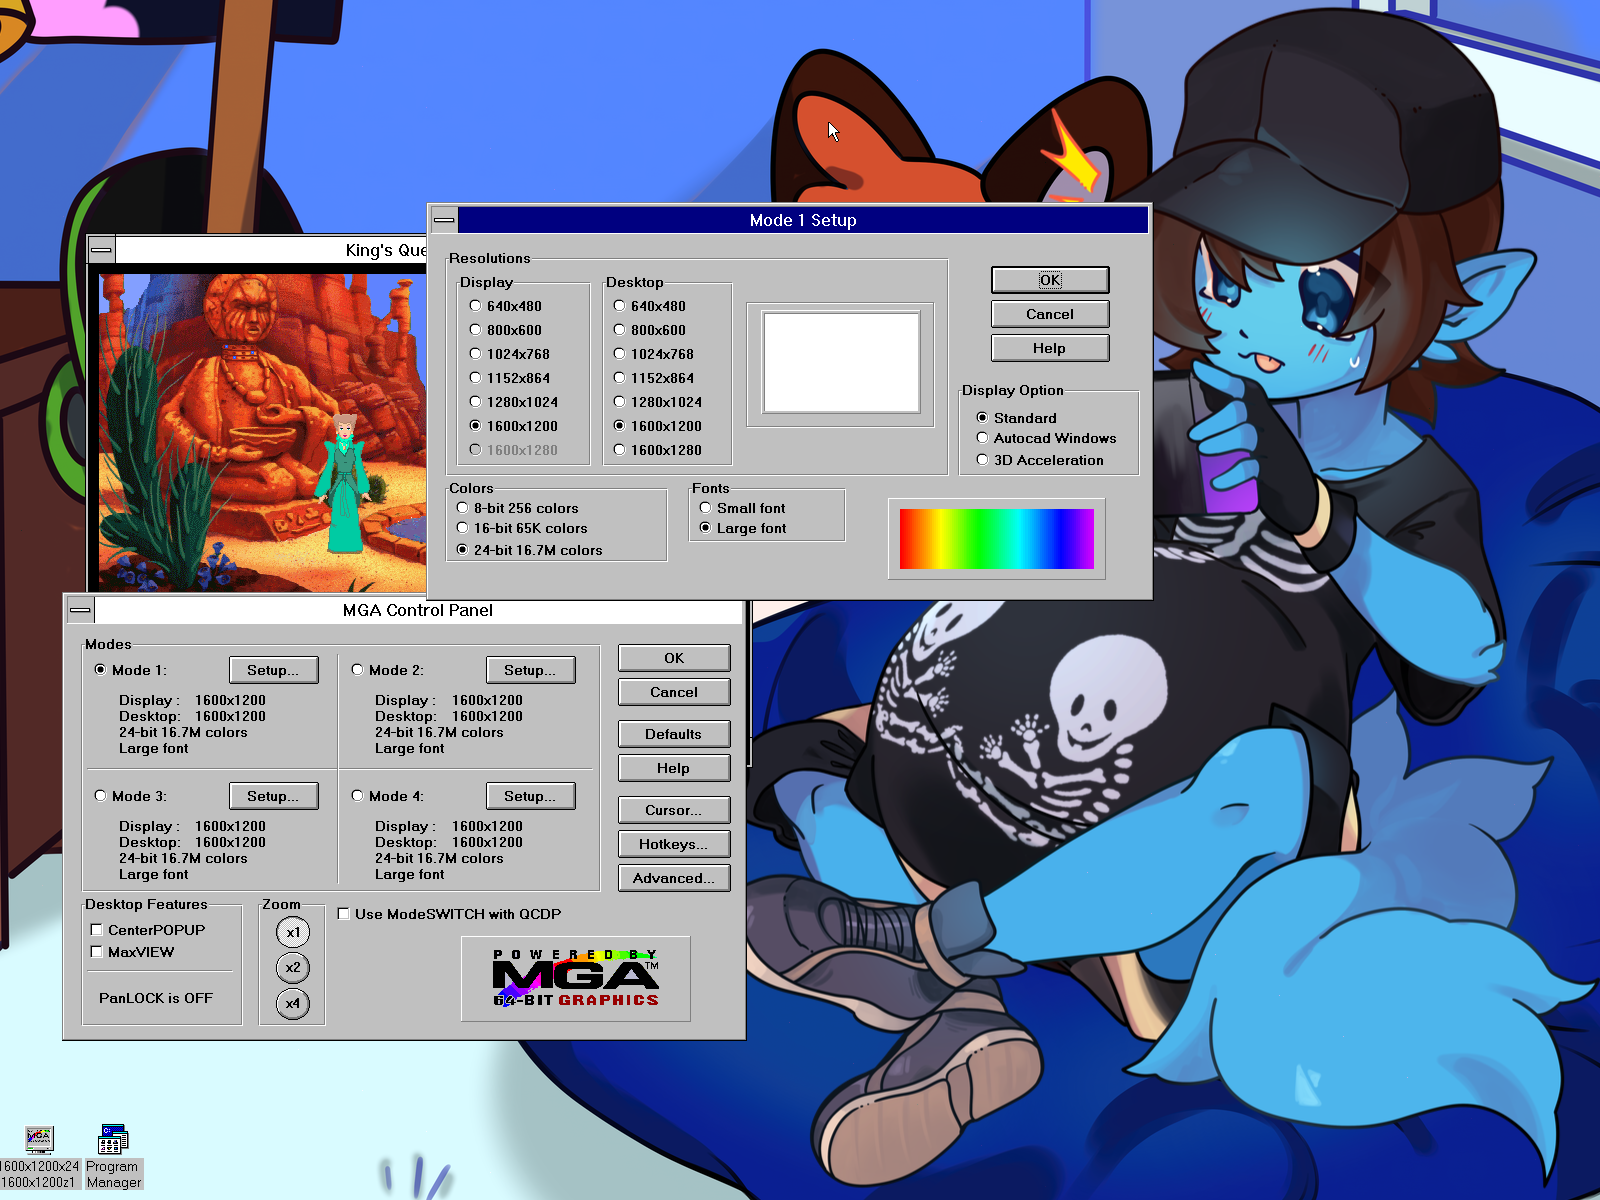
Specifically, I’ve chosen the Matrox MGA Millennium II, with the legacy drivers Matrox still provides, thankfully. Which gives me 1600×1200 with the 24-bit 16.7M true color mode. Sweet!
What’s even more interesting is the fact that the page I linked on the card says 1920 x 1080 is among the supported modes, despite the MGA Control Panel on Windows 3.x topping out at 1600×1200. Granted, this is based off the monitor I had to manually select for it, which was a max of that said resolution, since I went by the generic options that listed that resolution.
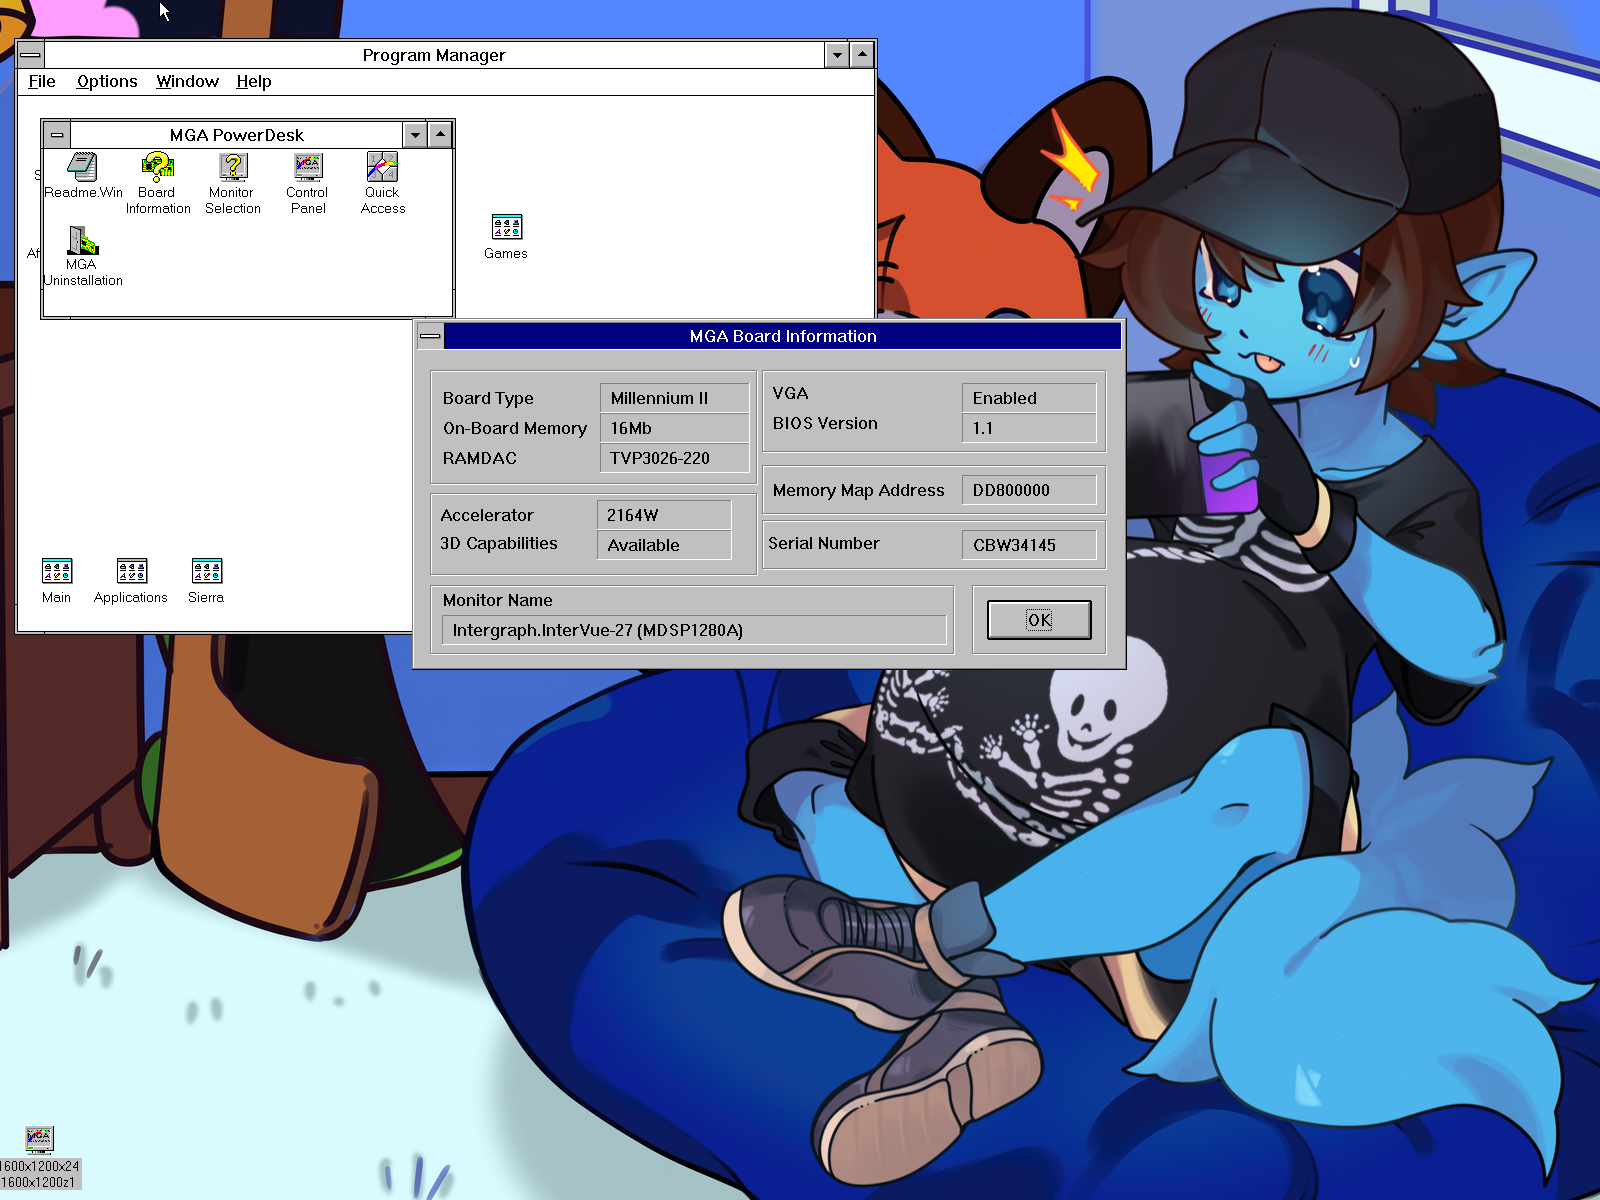
So with a bit of a deeper dive, I decided to check to see what some of these monitors on the list had to offer, especially by looking them up, which led me to try the Intergraph InterView 28hd96 CRT display, which supports up 2048×1152@80Hz, and 1920×1080@80Hz. However, no dice…
It seems we still cap out in the control panel itself, so I don’t know if the MGA Control Panel for Windows 3.x itself simply was never programmed to account for anything higher than this, but I may have to go on a deeper drive to see if there’s a way to override this as an experiment. I know it’s possible to run Windows 3.x under 1920×1080, given the fact PluMGMK has done so with the modern driver.
So there likely will be a follow-up with this later when I’ve made some progress. No doubt if there are any interests in going beyond 1600×1200 in general, for that nice perfect fit with today’s display standards, someone likely wants to know how to do it themselves as well!
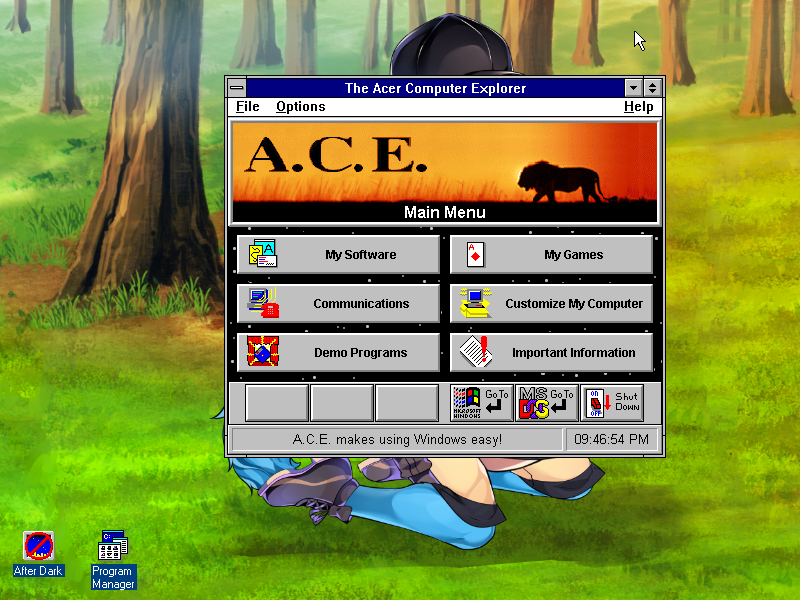
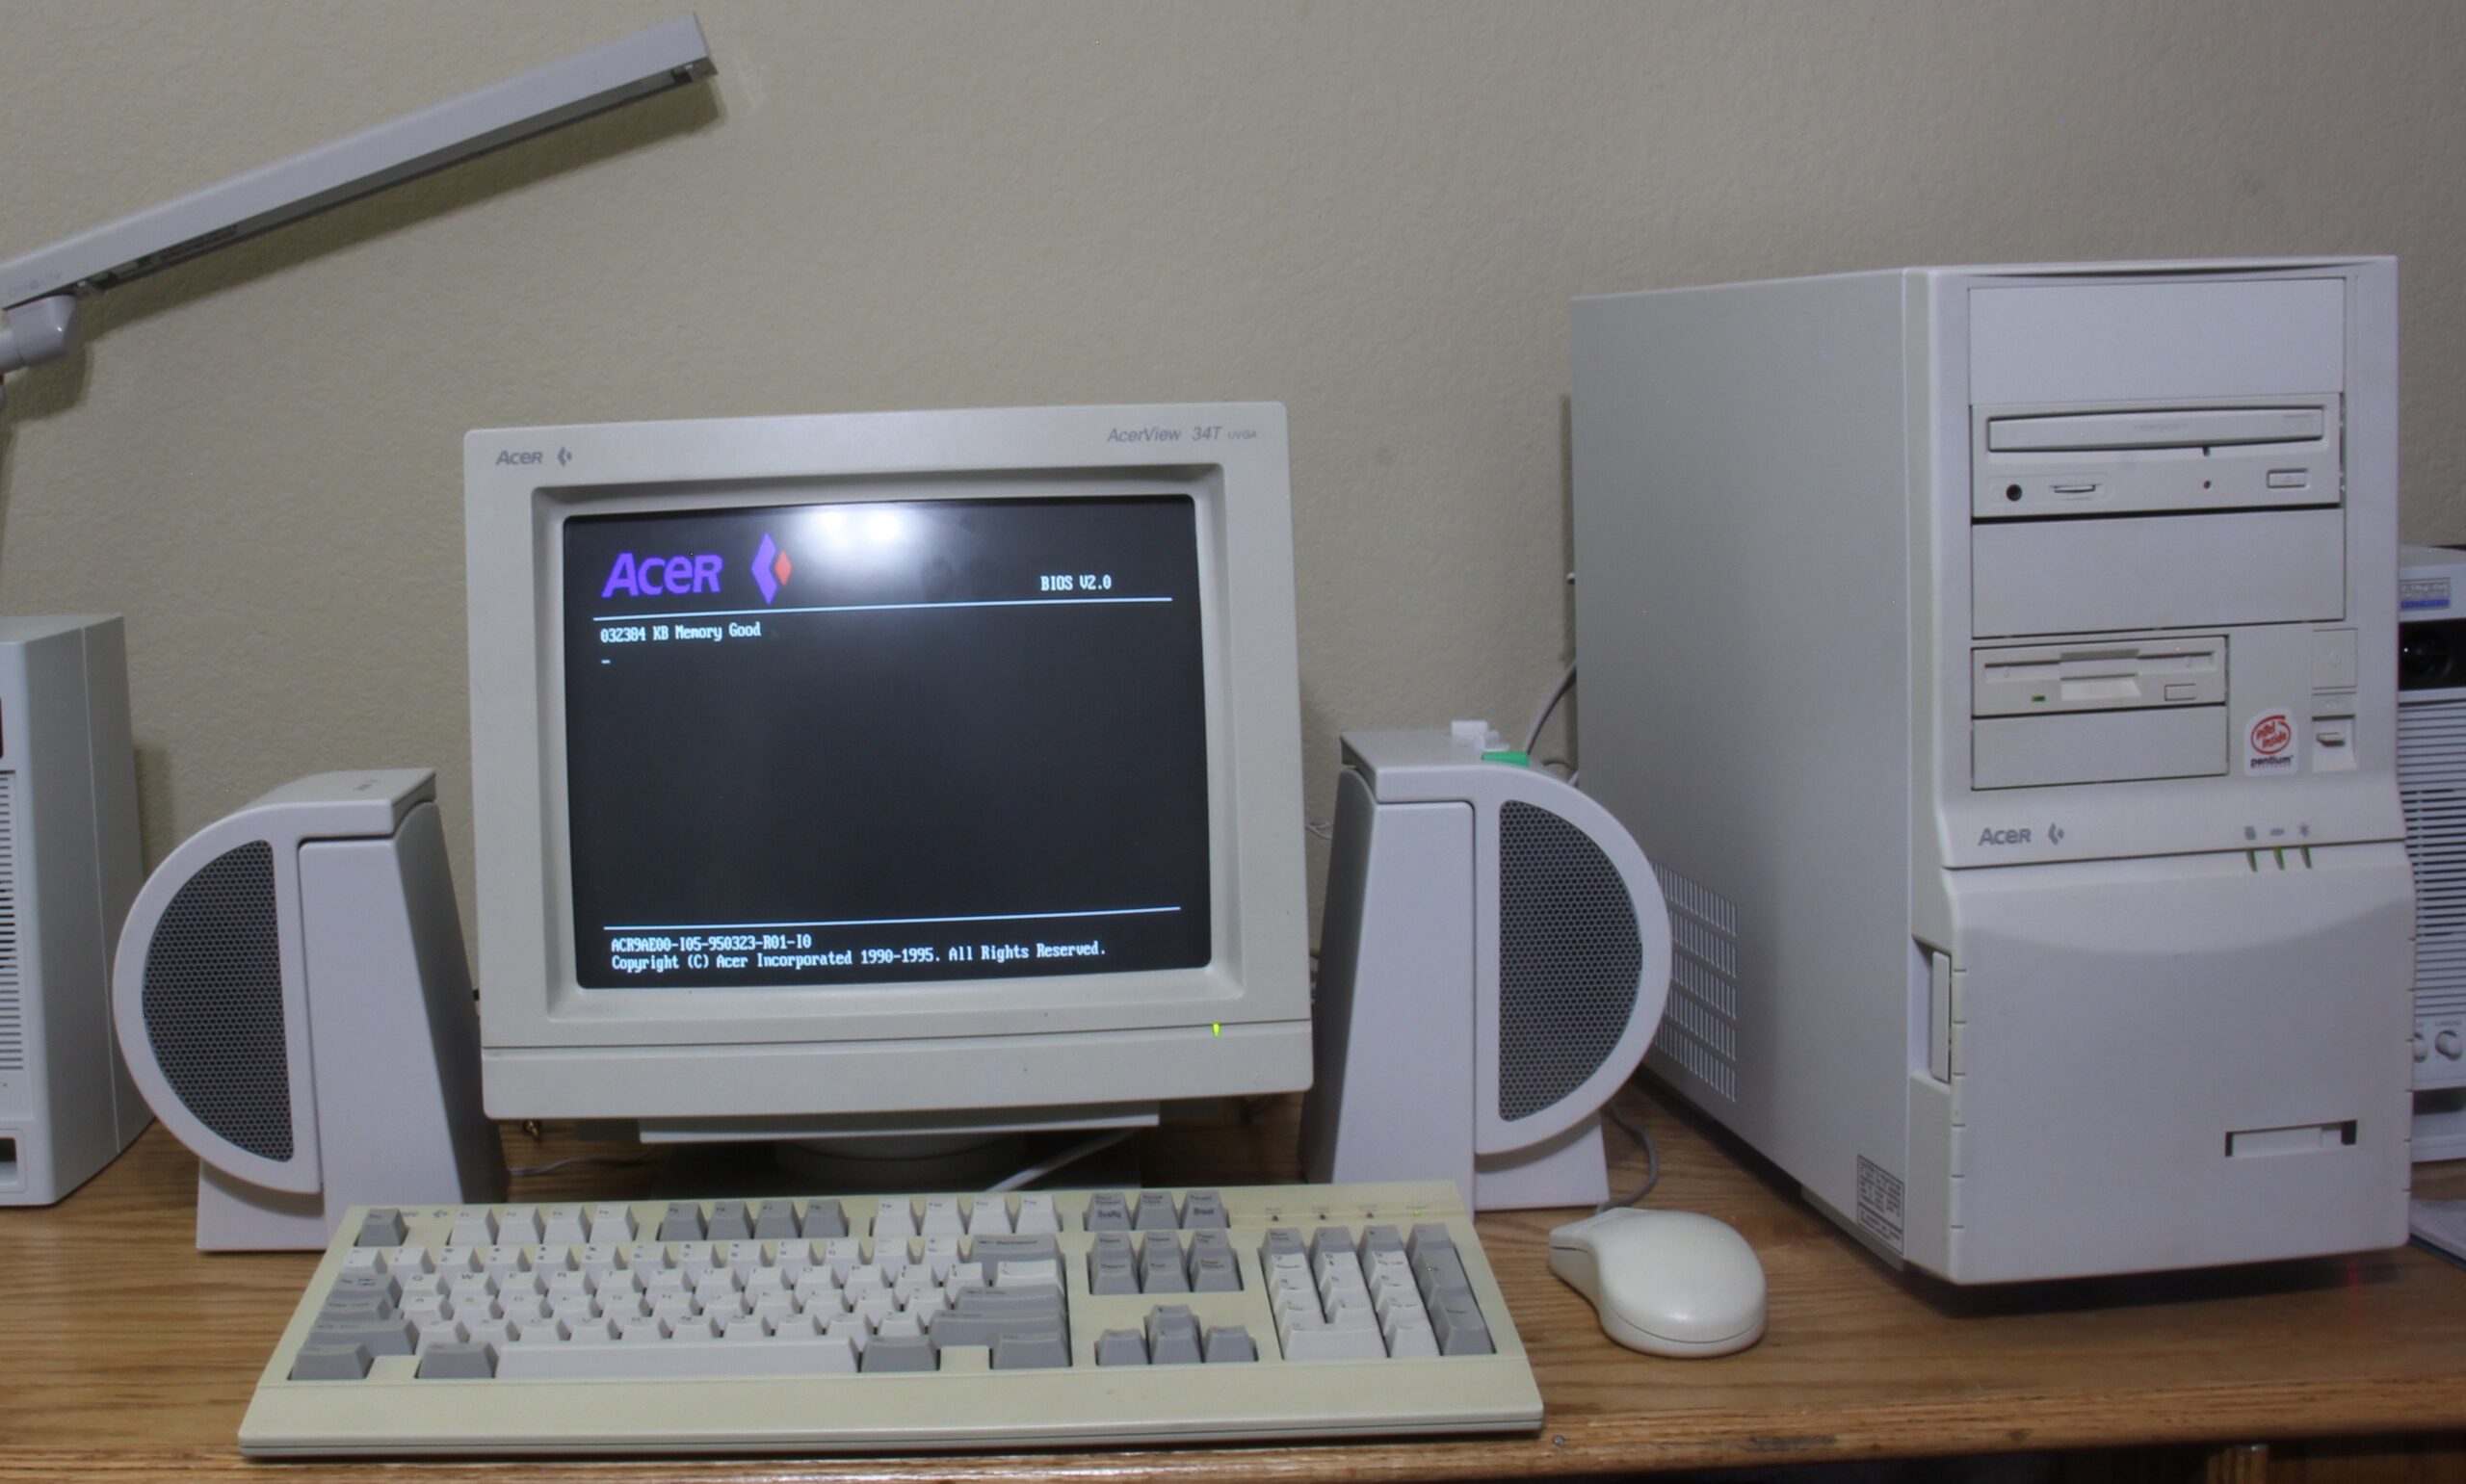
I want to mention a blast from the past of my childhood, as our first computer was an Acer Power, which had Acer Computer Explorer (A.C.E.) (v1.2), with Windows 3.1.
I know how obscure this software is, and I do want to apologize for any old comments I’ve missed due to spam prevention on this website on an earlier post regarding a way to acquire it. The excellent news I wanted to share with my fellow Windows 3.1 Acer fans is I’ve uploaded it to Archive.org right here: https://archive.org/details/ace-setup
It’s time I gave this place a good update, especially since I needed to maintain the most up-to-date versions of PHP and WordPress both, I decided to go with the Toocheke theme in place of the good ol’ Comic Easel theme I once used and customized. My friend Ryan, who runs TheCenterWorld.com is who originally inspired me to use the Comic Easel theme to begin with, and he had helped get me in the right direction back then.
I’m glad he found a really nice theme this time around too, because it’s given me the ability to edit it enough to maintain an updated look I personally enjoy a lot of, combination of a glass theme that I loved about Windows Vista / Windows 7 back in the day, and a combination with a bit of that outer space look. For example, the old Solaris and Space Pilot 3K themes you could once get with the old phpBB forums back in the day! The former being the one my friend who runs RaymanPC.com had used back in the day.
I’m still working on the theme a bit, but I’ve reached a point where I feel like everything is looking pretty solid so far. Anyway, that’s it for now!
Time sure flies when you’re having fun, but as someone with ADHD, I really don’t have a concept of time, and especially when I get side tracked with other projects and video games, I sort of neglected this site for the better part of the past decade.
In a way I do regret it, but I must move on with life, and I do plan to try to make use of this website again, maybe slowly, but surely. I’ve always wanted to get into a bit of content creation, but I feel something simpler like blogging may be more up my speed.
So the past several years has been quite the journey for me, roughly around when I stopped writing any new posts, I’ve been more focused on my home theater progress at home, especially as I had more frequent forums like AVSForum. Though things had been rough since I lost my really good friend Doug back in 2016 who really helped encourage me on getting more into the DIY nature of home audio equipment, such as building subwoofer enclosures. I still miss him greatly to this very day.
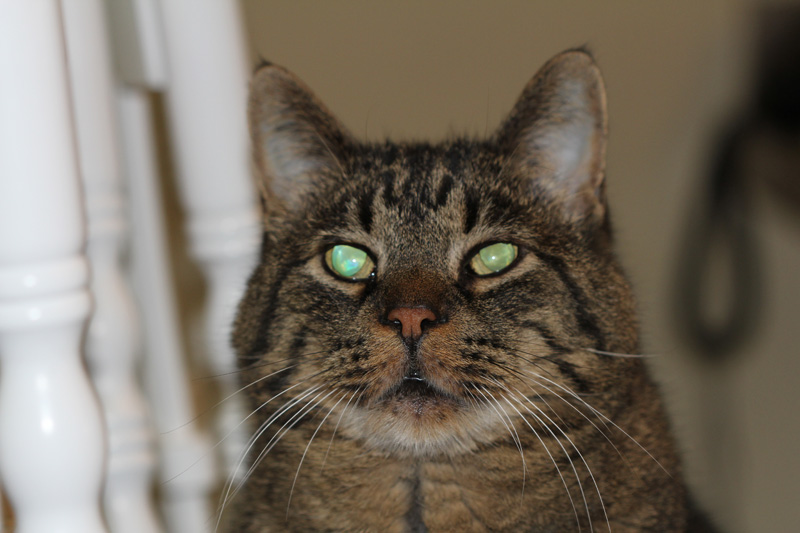
Then in 2017, I lost the first cat I’ve ever had in my life, who passed away at the age of 19. He came to us when he was a little kitten back in 1998, and he had been with us ever since.
The funny thing about it was my mom never liked cats until he came into our lives, he was my little buddy and he’s pretty much what made me fell in love with cats, especially tabby cats. When making my own characters for my own story building, a lot of them were based on tabby cats, as a form of a humanoid cat-hybrid. Which my friends who I’ve created stories and role played with over the years would know they were my favorite. How my main OC, Reese got away with being a wolf-hybrid sometimes makes me wonder myself! Though I have no regrets there regardless! I’m happy with his design as well as the rest of my characters, and I’m thankful that my beloved cat had a form of inspiration on me, especially to keep my memory of him strong to this very day.
Now, late 2019, is when things began to change direction for me, when I got into Splatoon 2. The funny thing is, I never thought to give this game a chance when Splatoon came out on the Wii U, let alone when Splatoon 2 came out on the Switch. It wasn’t until a couple of friends got me to try and I got hooked, to the point I got into the competitive scene on there. Those times became somewhat of a blur, but I’ve met some of the greatest friends of my life through this game.
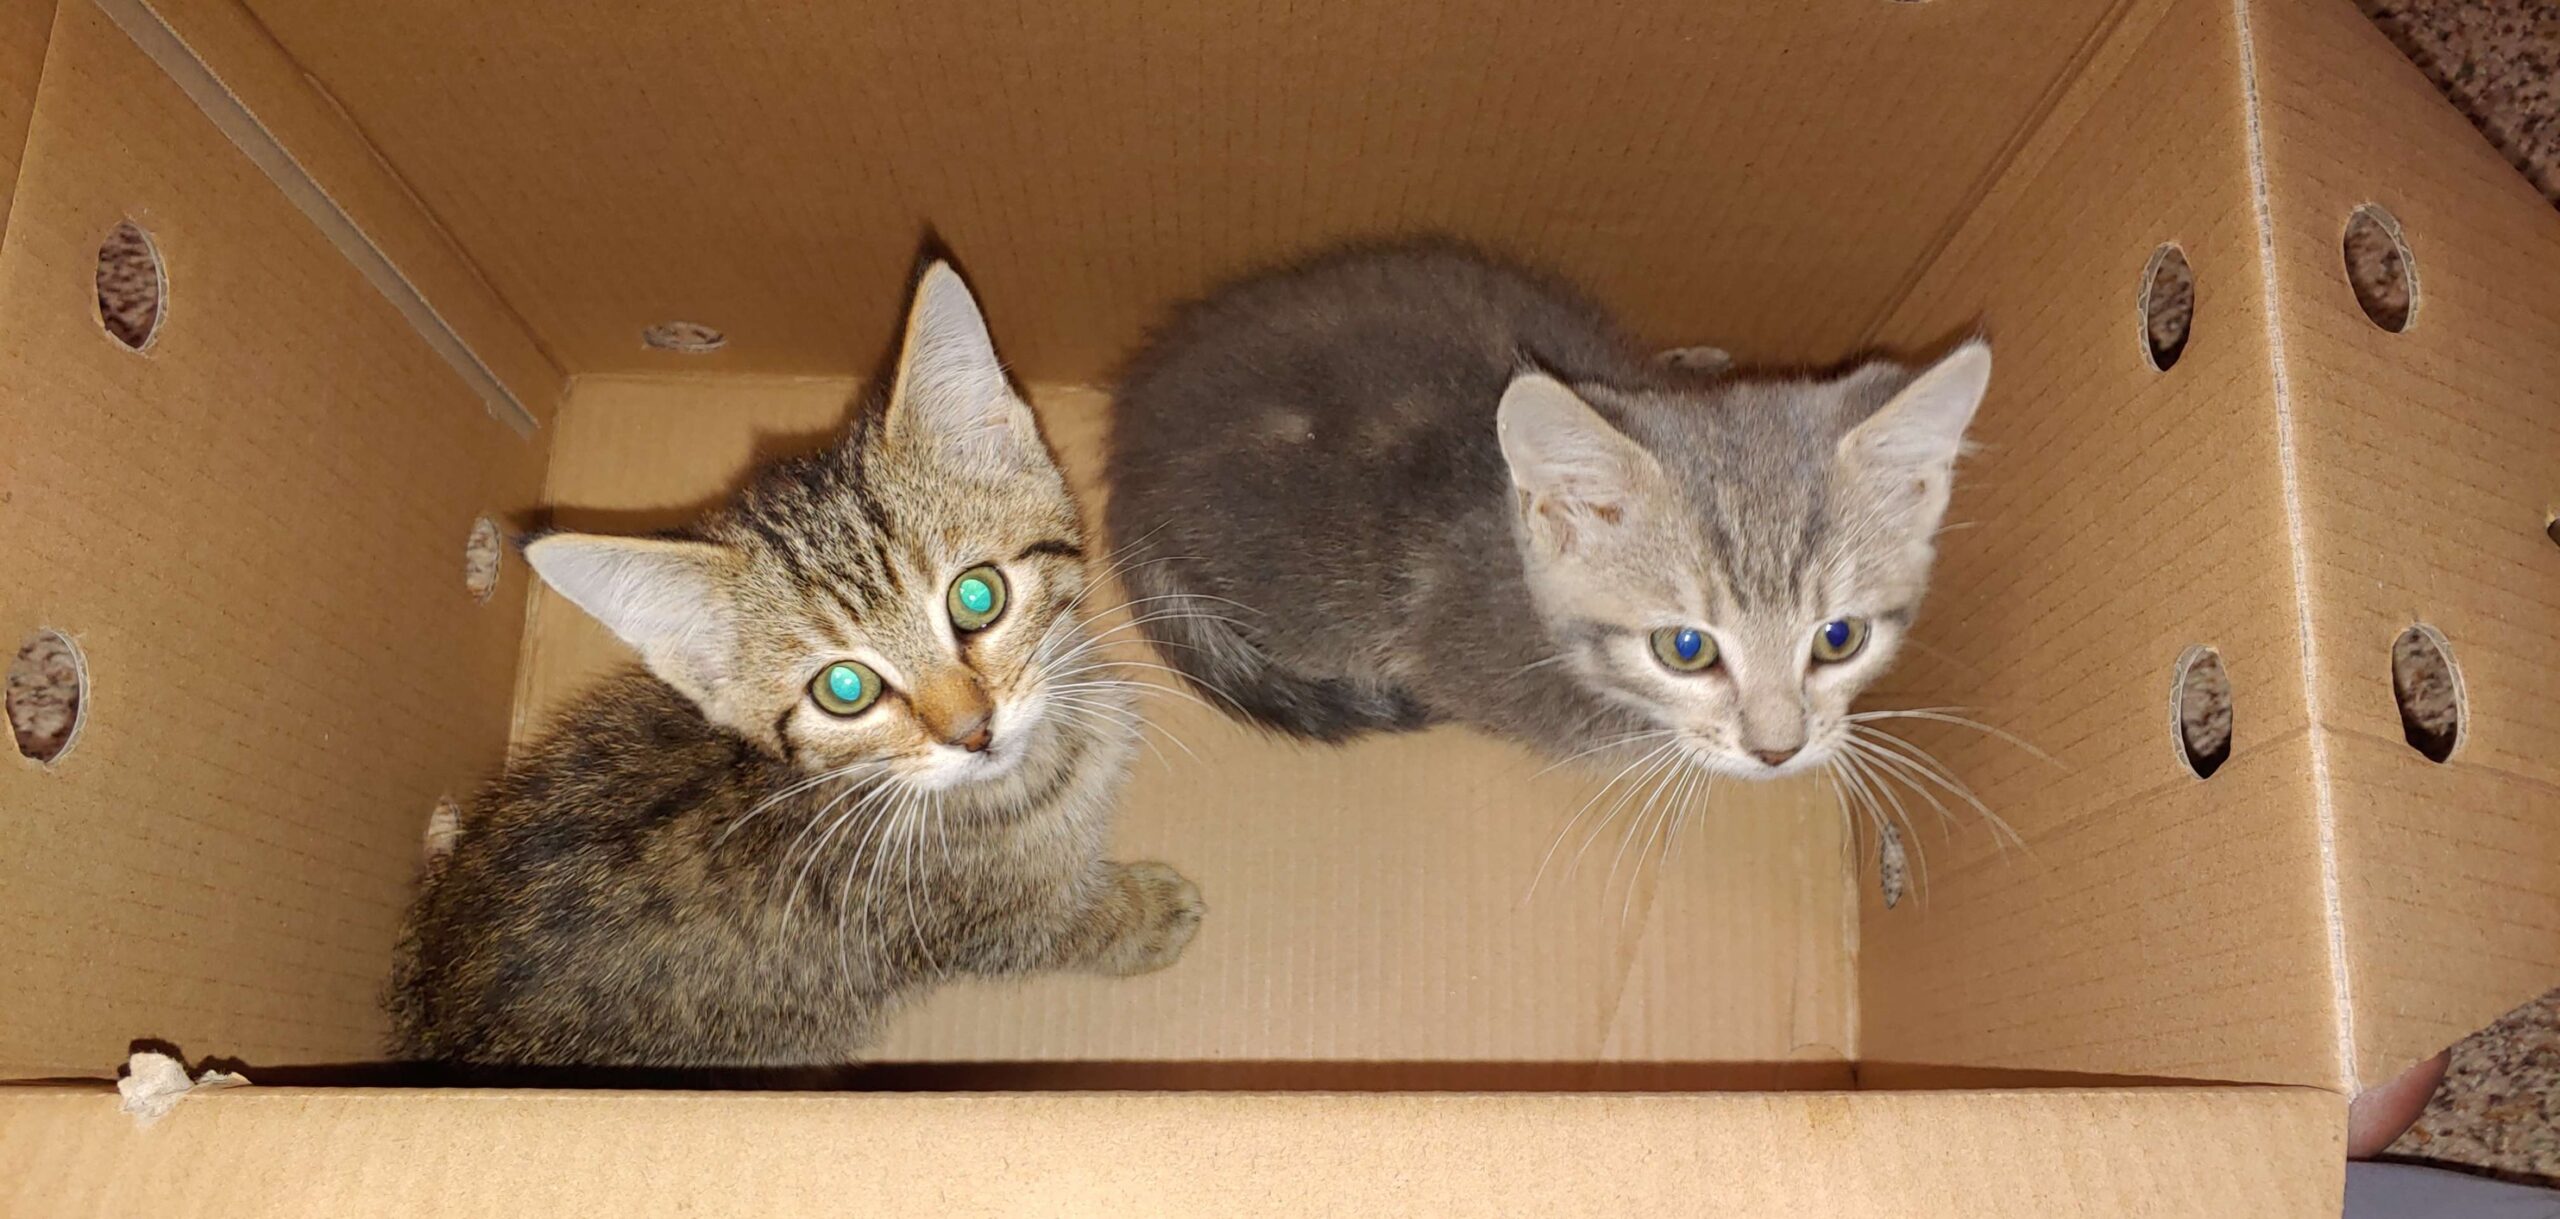
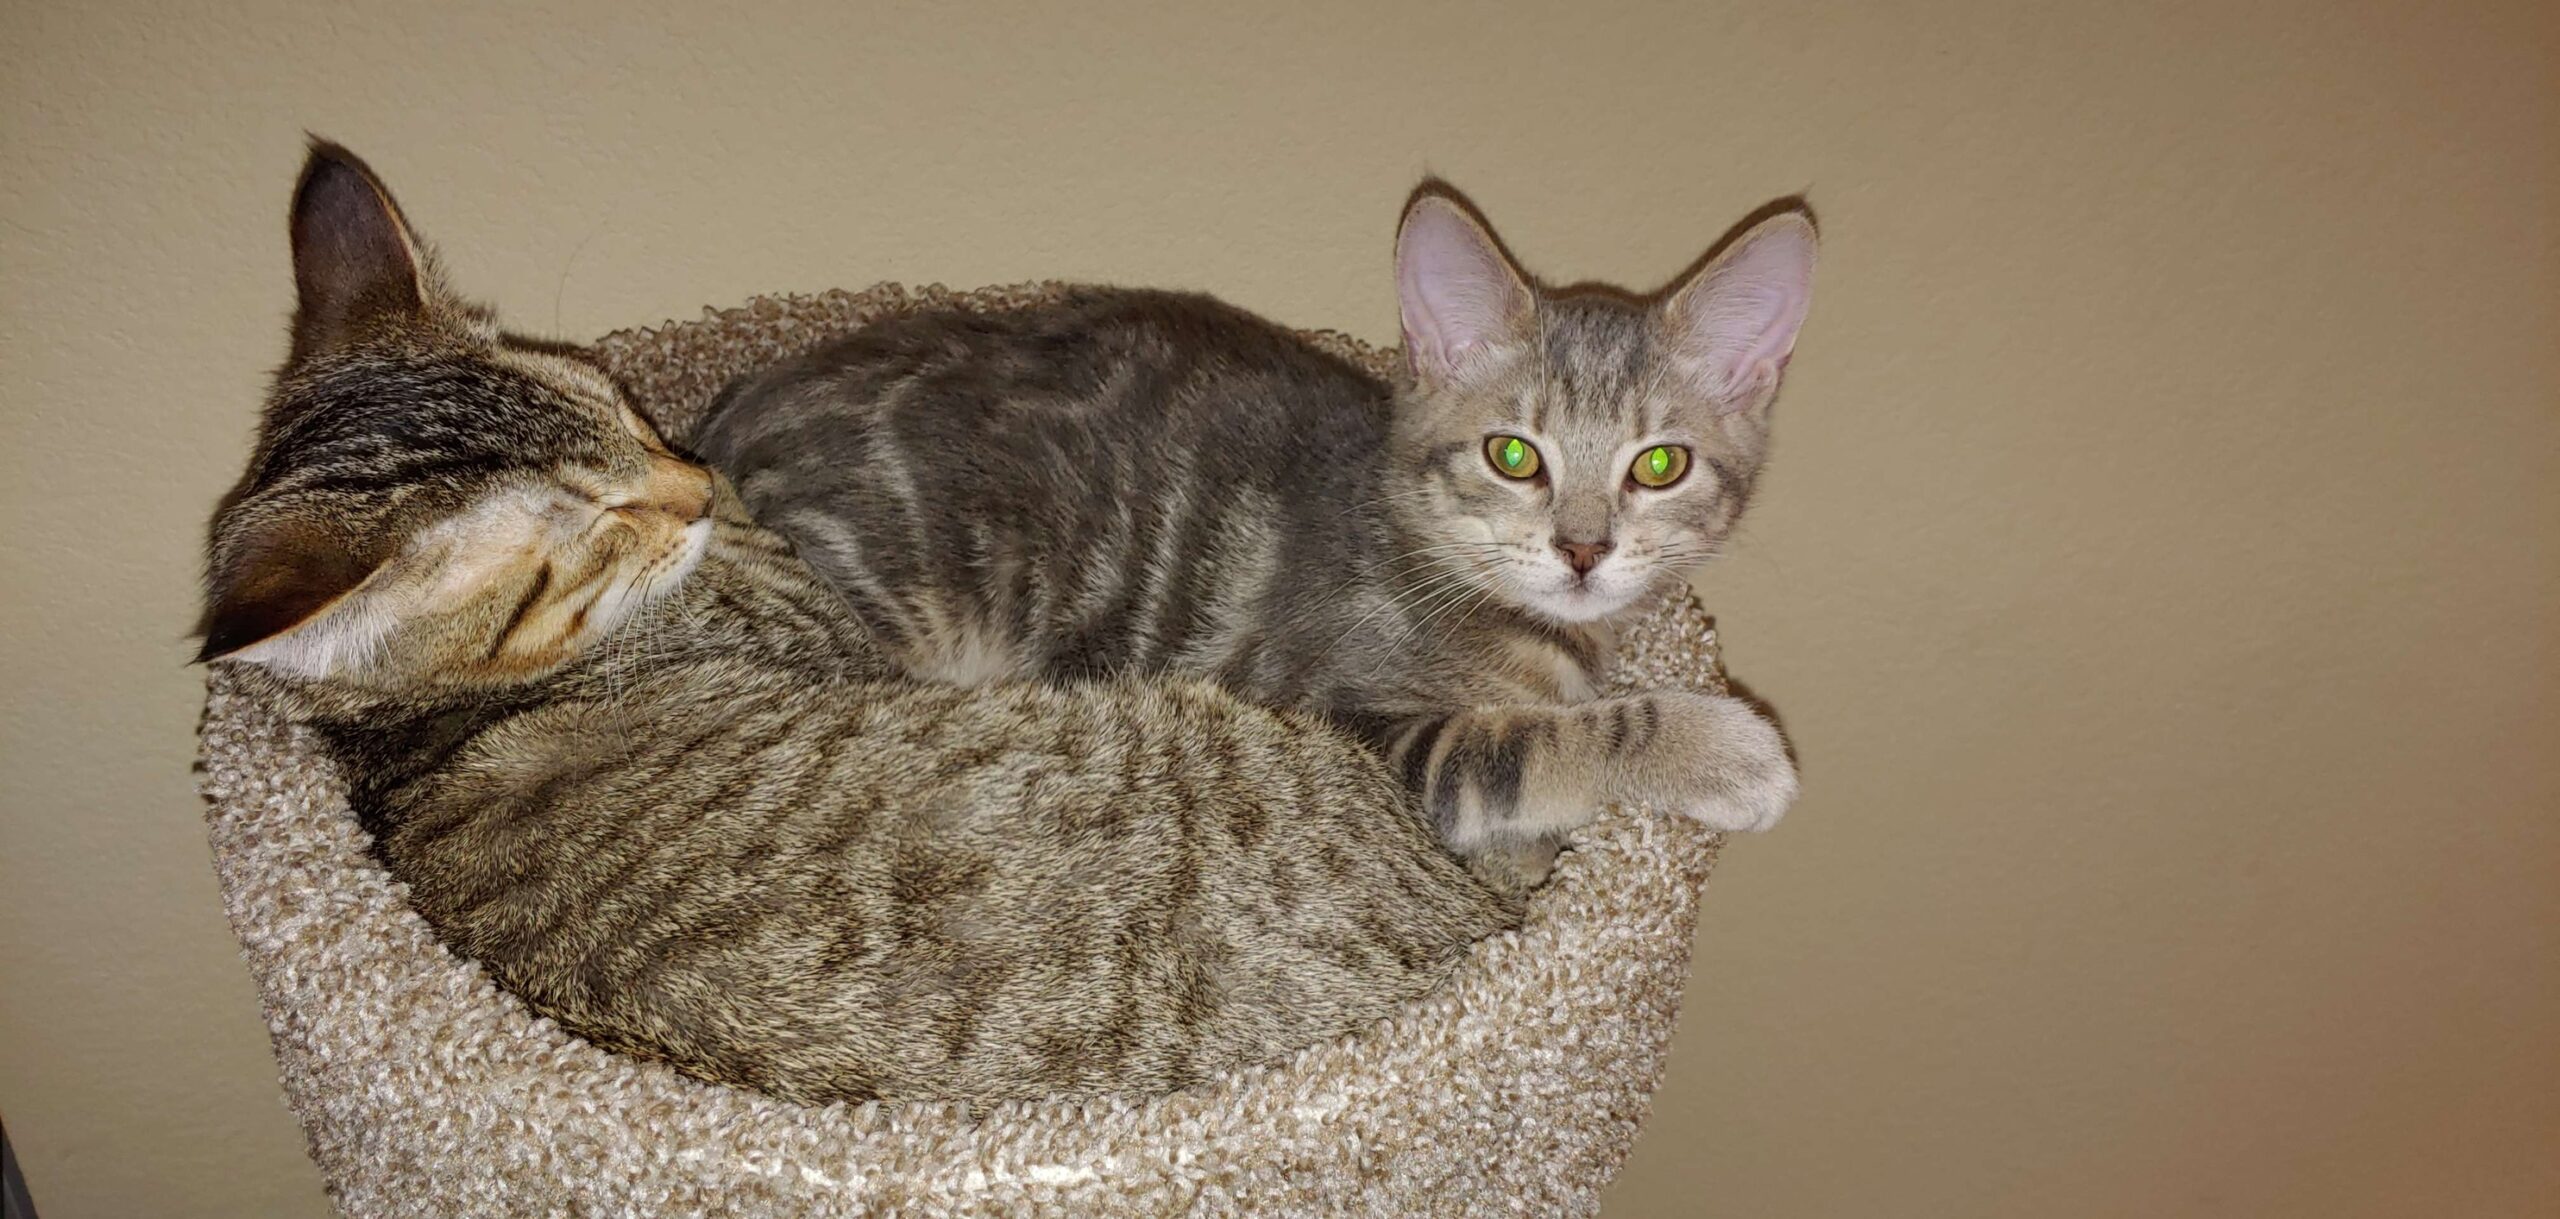
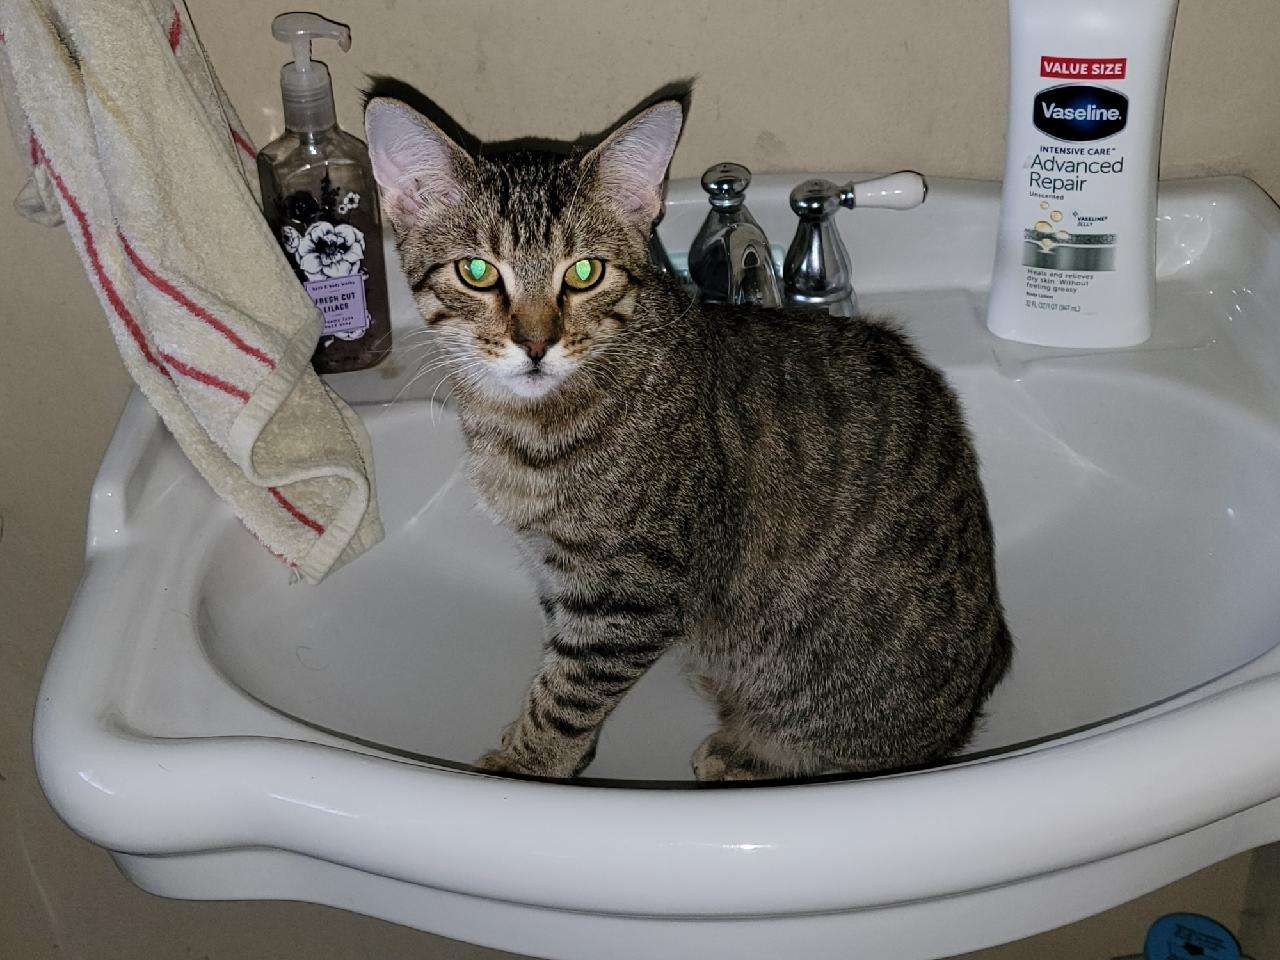
2022 came around, and we finally adopted two beautiful kittens I adored the moment I laid my eyes on them:
Sadly about a year later, we discovered that my silver tabby had to have surgery due to a fracture in his left hip in the femur bone, caused by some sort of disease that causes it to be weak with lack of strong development of sorts, I could never remember the exact terms our vet described, but it was genetic. We did the leg saving route which required a false joint procedure, which was rather successful for him, but our vet did say his other leg could be at risk for the same thing.
Come 2024, my other cat had developed the same issues, which he needed the same surgery as his brother, since that litter of kittens ended up dealing with the same thing, from what our vet told me. I though everything would be fine, since his brother recovered no problem. My heart was shredded and broken to pieces when I got the call he passed away on the operating table… This was incredibly hard for me and my family, since he was the baby of our home.
To this very day, I still miss him a lot, he was my little fetcher, he would chase the cat toy across the room, and bring it back to you to play fetch.
Our other one learned how to open doors on his own, but this one just was our little fetcher, it was adorable.
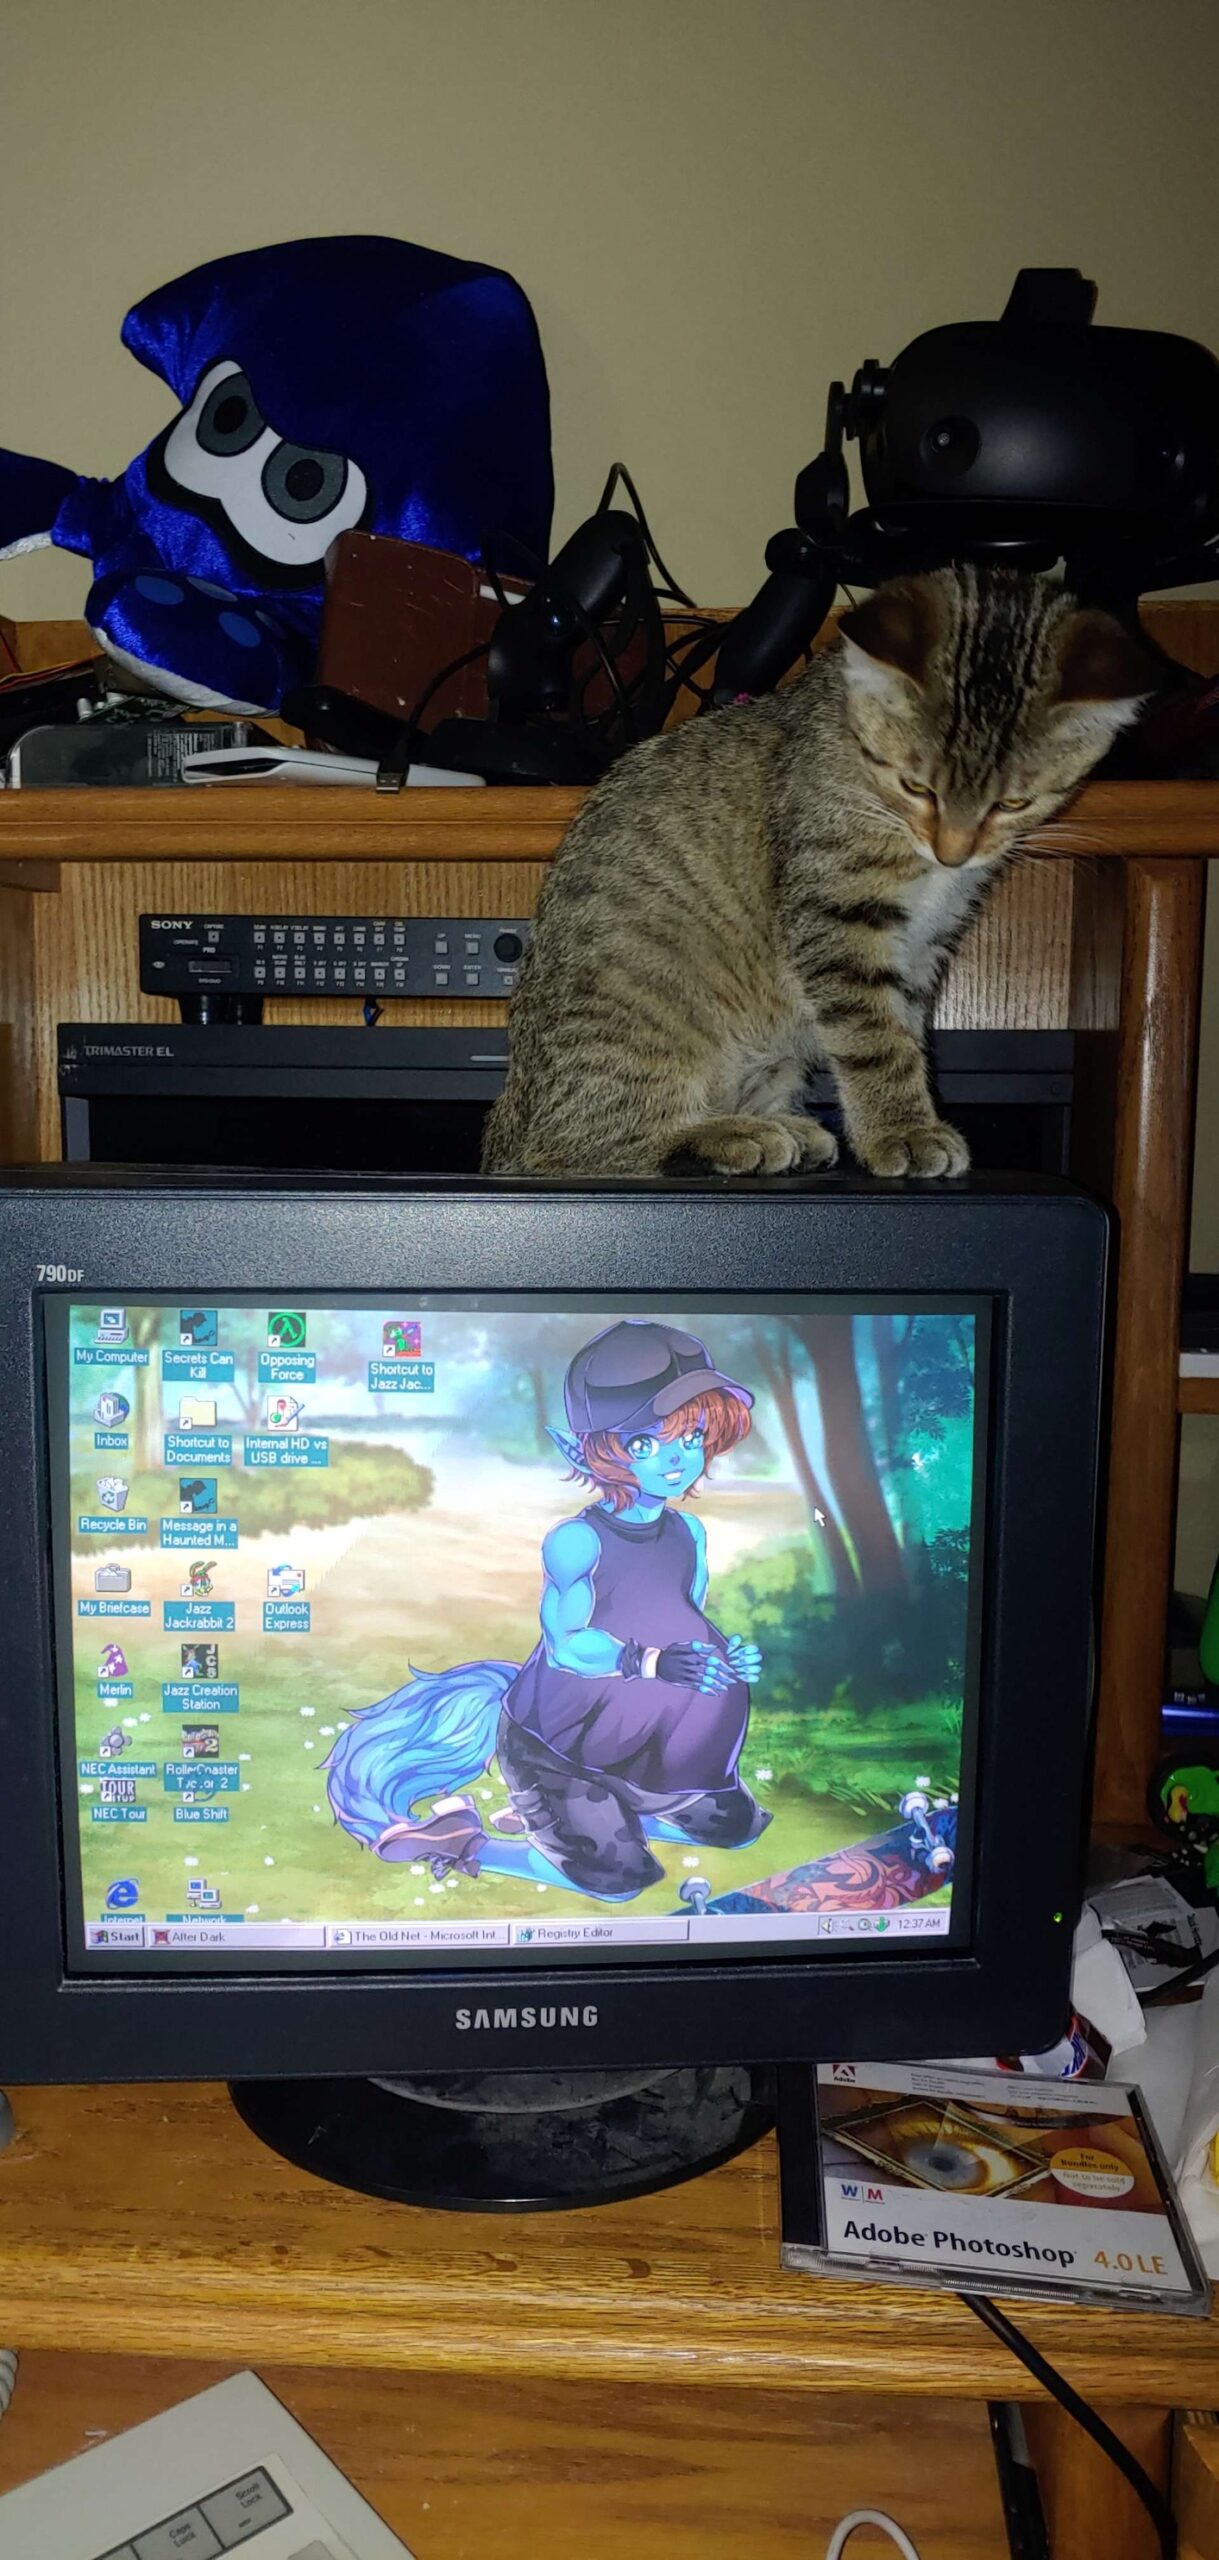
He at least got to be a CRT kitty at some point, I still remember when our first cat would lay across this same very CRT monitor of mine, when it was my daily driver.
After a bit of time, I know it was also hard on his brother, but as time goes on, we managed to handle ourselves better, but we’ll still always miss my bob-tailed baby.
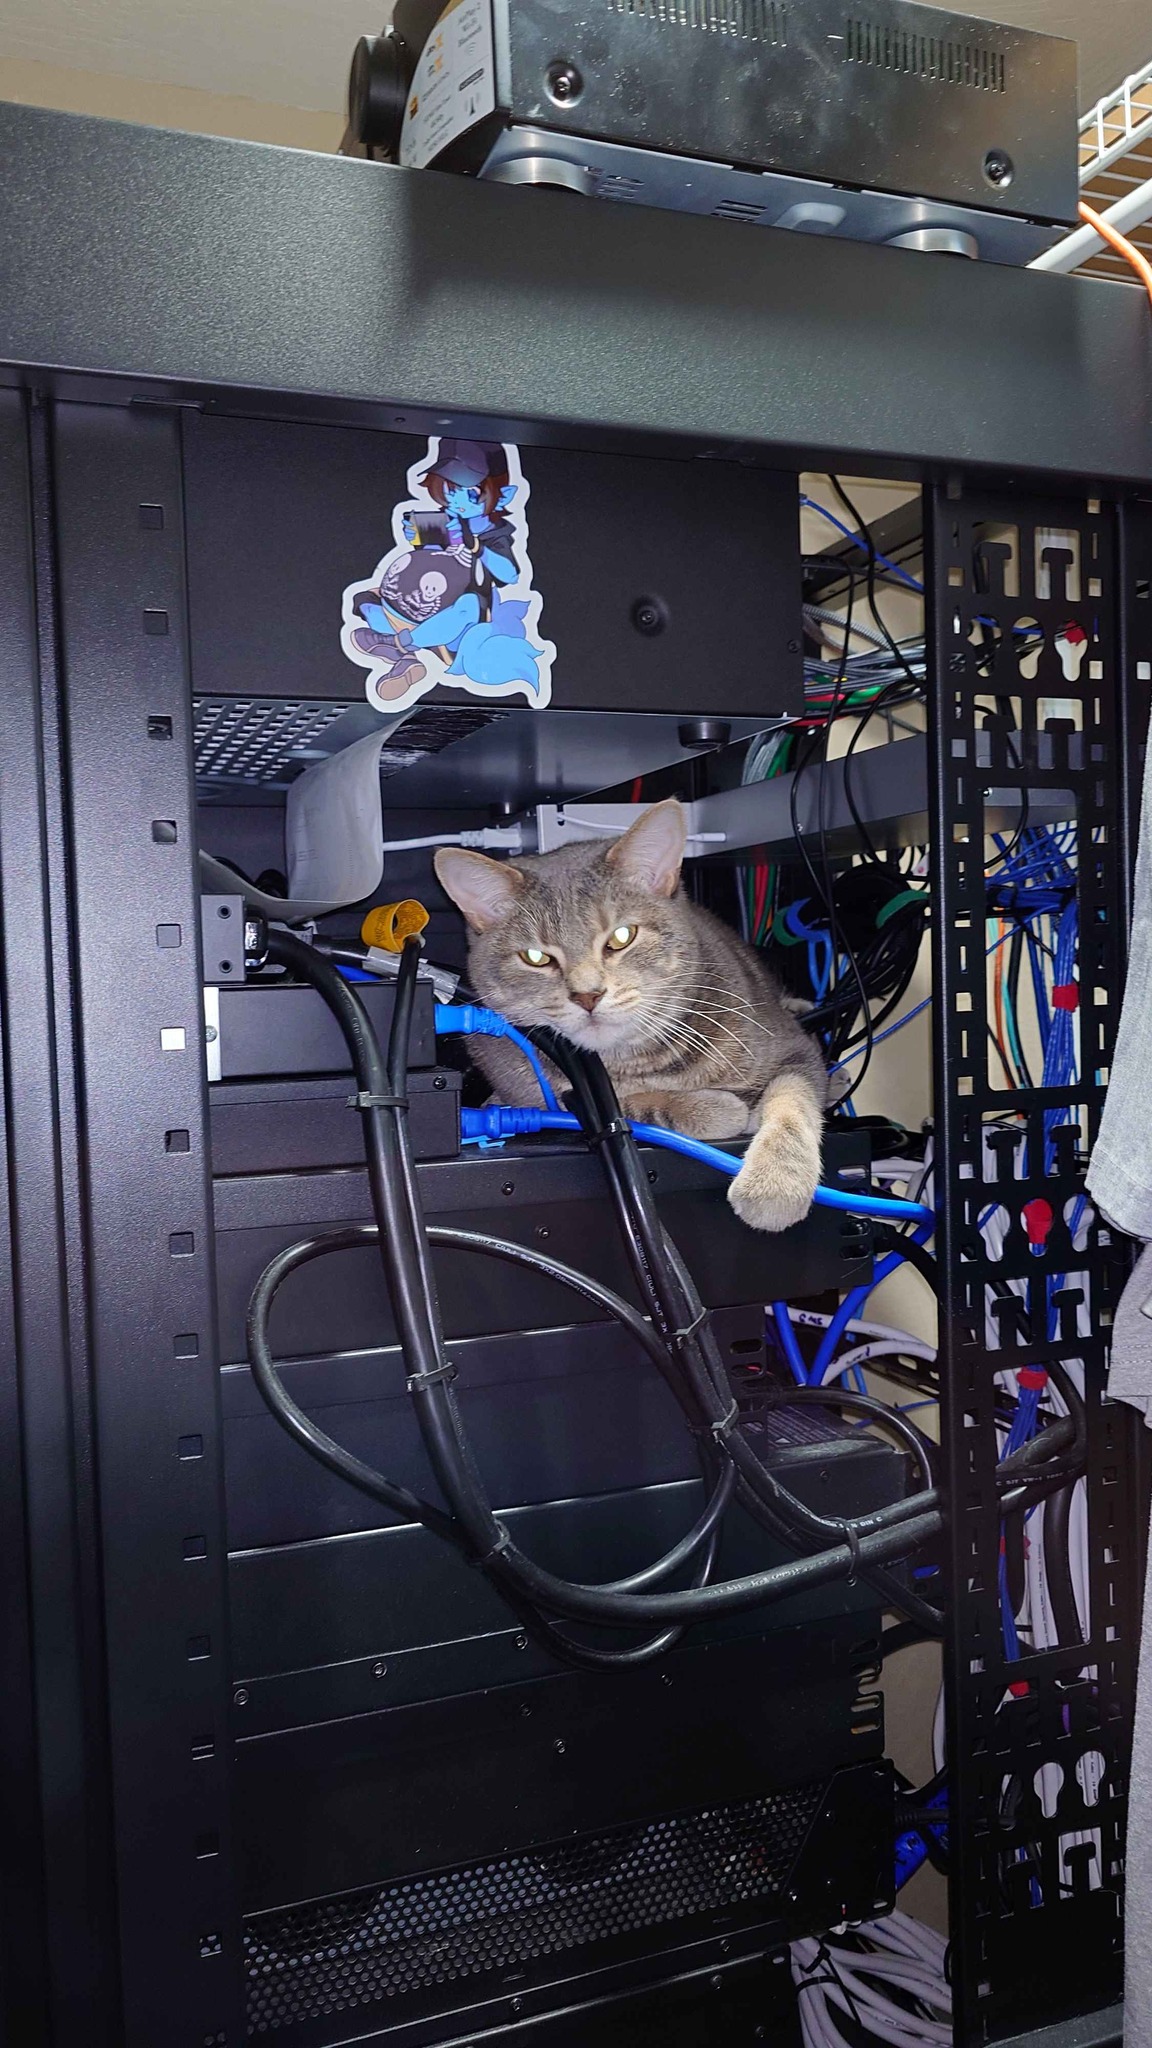
Here in 2025, things are going okay, though, as my silver tabby wants to blend in with the amp rack in my home theater rack sometimes:
There has been a lot of updates regarding my systems and setups over time, but all too much to really go over in this post. Health wise I’m doing well, and so is my family and my cat, we’re all doing the best we can.
I’m wanting to make my next update something computer or audio related, whichever comes to mind first. Until then, thank you for spending some time reading up on this!
One of the most awesome things have come around on the internet, involving classic games such as Red Baron II, which included a coupon for Red Baron pizza. One game reviewer who I greatly support, has done such an adventure, and he is Lazy Game Reviews. I highly recommend checking his website and Youtube channel! Below you will see a fine example of his work, the pizza adventure! I won’t spoil any details. 🙂
Now, I’m hungry and ready to eat some pizza, thank you LGR! 😀
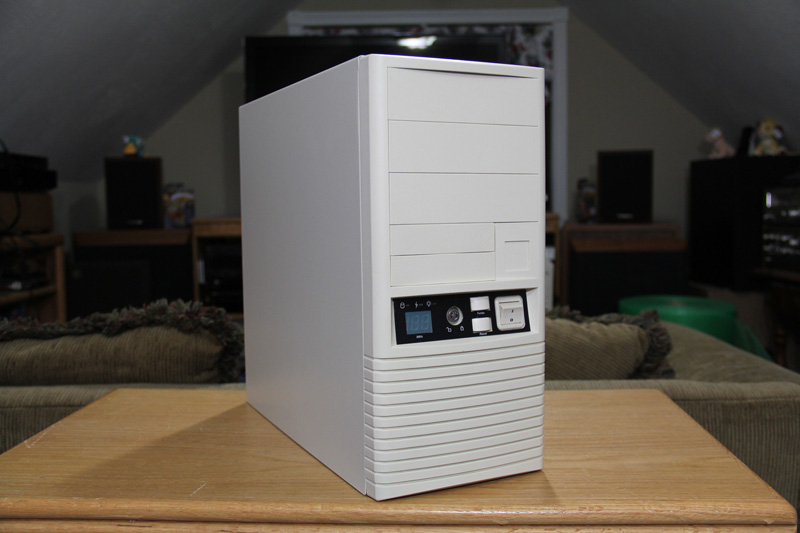
Greetings everyone! I have an AT style computer case, new old stock that is waiting to be assembled. However I have several choices and thought it’d be fun to let others have some input in which board to choose from! I am considering making a build log, either by making a video or posting pictures here.
So first off, this is the computer case that I will be using:
Inside, it still has the baggy with instructions for the MHz display, feet, PC speaker and some motherboard mounting goodies. All ready to go!
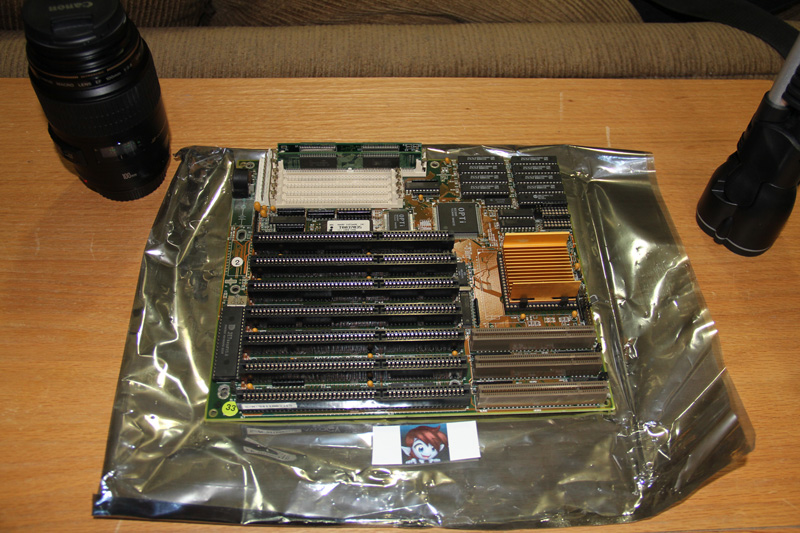
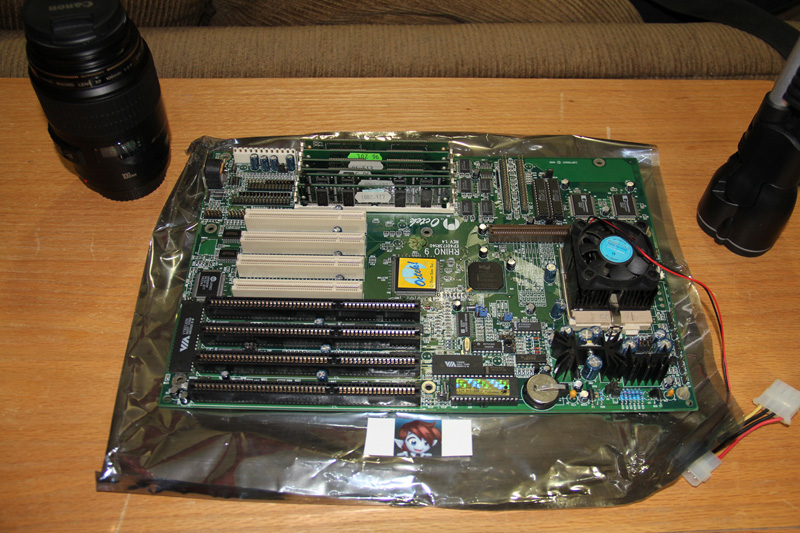
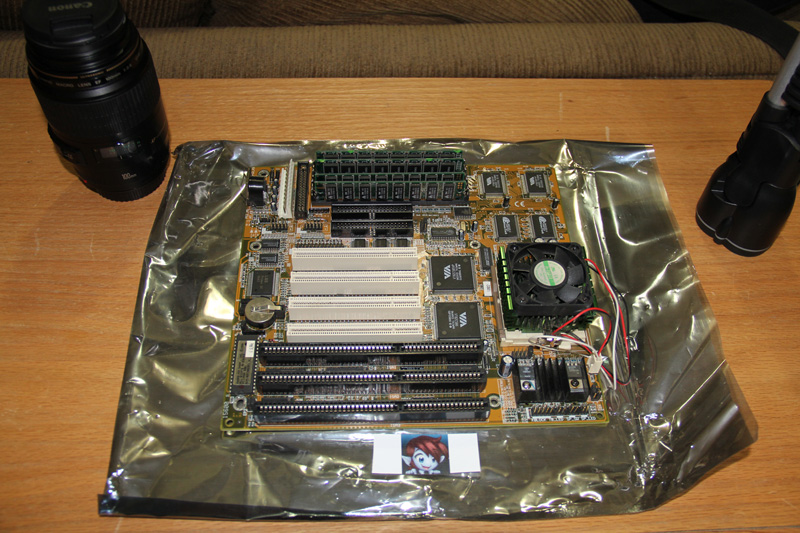
Now here are the motherboards of choice! 🙂
AMD 486 DX2 66MHz with 16MB RAM. Just needs a little bit of cleaning where the old CMOS battery was located, and a new replacement or external battery and it’ll be good to go!
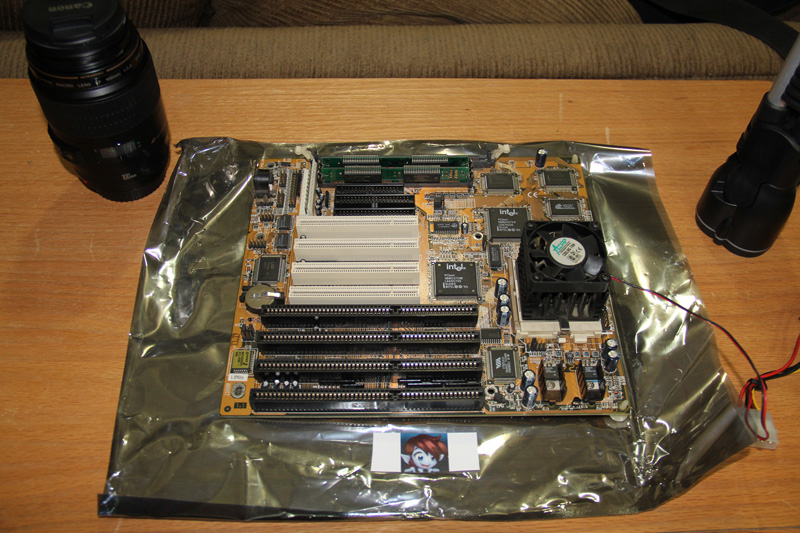
FIC VT-501 Motherboard with a Intel Pentium 120MHz processor and 16MB of RAM.
Intel Socket 5 Motherboard with a Intel Pentium 133MHz processor and 32MB of RAM.
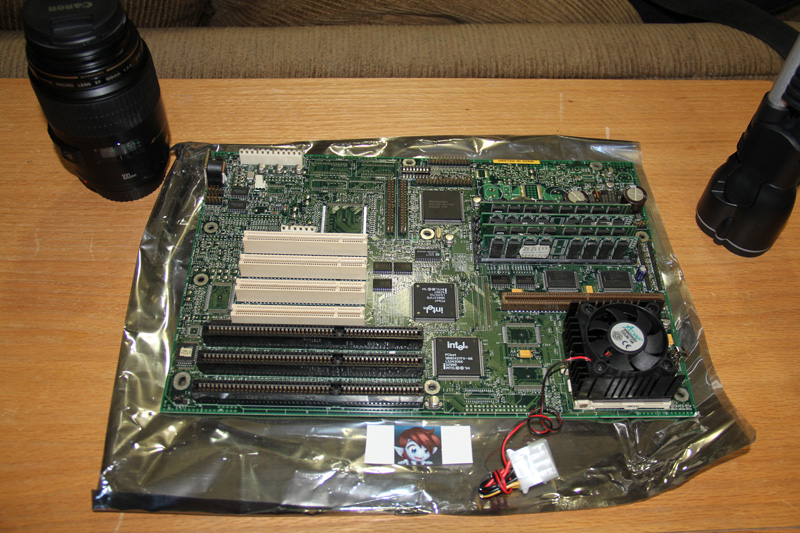
FIC PA-2002 Motherboard with a Intel Pentium 166MHz processor with 16MB RAM.
OCTEK Rhino 9 Motherboard with a Intel Pentium 166MHz processor with 32MB RAM.
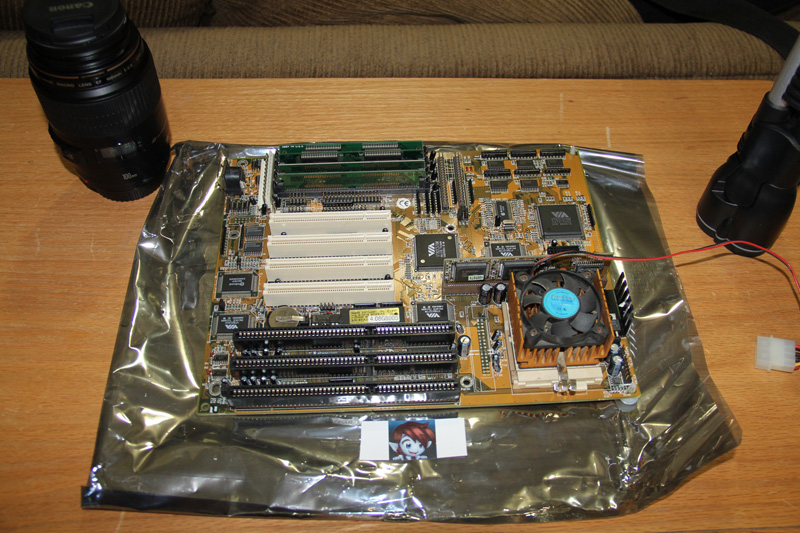
FIC VA-501 Motherboard with a Intel Pentium MMX 166MHz processor with 48MB RAM.
I’ve been wanting to build an Intel Pentium system for some time, and finally got around to it after obtaining a AT style socket 7 motherboard. Our very first computer was an Acer, which I think was an AcerPower style system I grew up with as a kid, with Windows 3.1 with A.C.E. (Acer Computer Explorer)
What A.C.E. looks like:
It had either a 66MHz or a 75MHz Intel Pentium processor. I wish I still had that system, but I hope to find another one or the same case. However, for the time being, I will have to be content with this latest build!
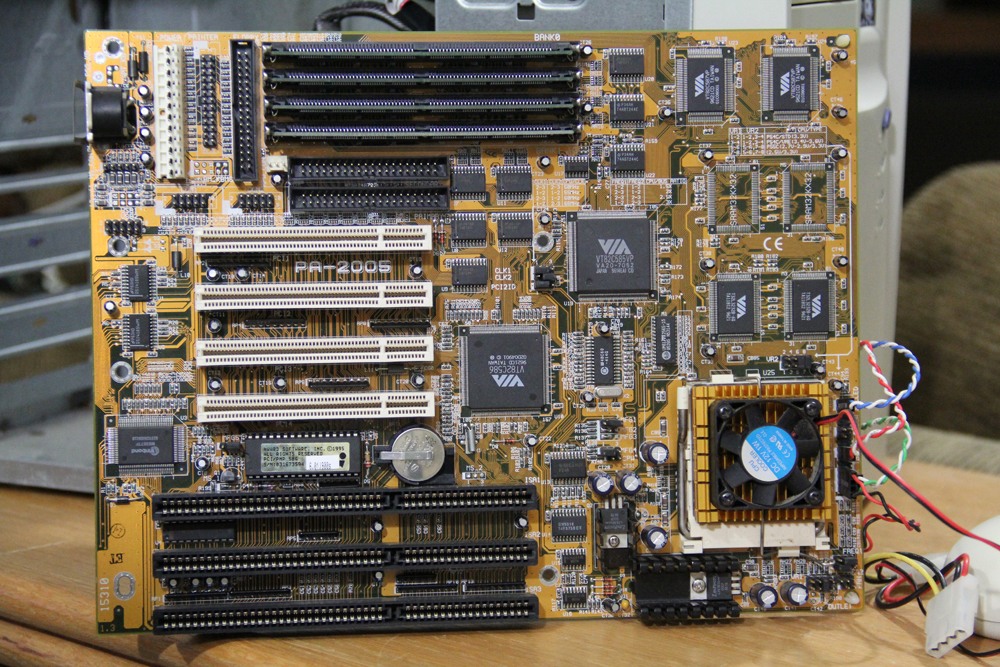
After obtaining a nice AT style case for the hardware, I began assembly rather quickly, as I began to be pretty excited. However I ran into an issue with the system actually wanting to boot. At first I would have to hit reset a time or two after it was already powered on. It was thanks to a member at Vogons, by the name of Mau1wurf1977, who helped me realize I needed to verify the jumper settings, and what would be appropriate for the CPU. Which I spent some time researching the CPU itself, which is a Intel Pentium 133 – A80502133. Then after finding the right motherboard chart (Which wasn’t necessary due to the settings being listed on my board itself.) but the PA-2005 I have, has two setups for the voltage. Single and dual. Dual being for separate Vcore. Thus having caused some instability. After getting this situated, it powers on quite well!
Here’s a close up, of the voltage selection, it was originally set to P55C (2.7V-2.9V/3.3V). Which is a dual voltage setting, former voltage being for the vcore and the latter being the I/O. Which is completely irrelevant to the Intel Pentium A80502133 CPU’s need, it is a single volt chip. So the proper setting on this board, is P54C/STD(3.3V). I recommend anyone building their own system to double check this, even if the board you may obtain has the CPU. Mine had come with it’s CPU, but the voltage wasn’t set correctly when I got it. Just be sure to verify the settings. 😉
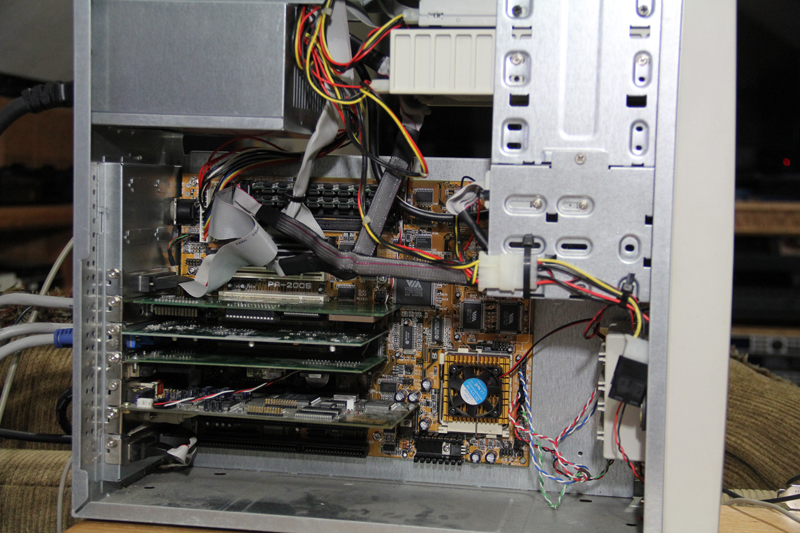
So here, we shall begin with the motherboard, which is a First International Corp. PA-2005 board:
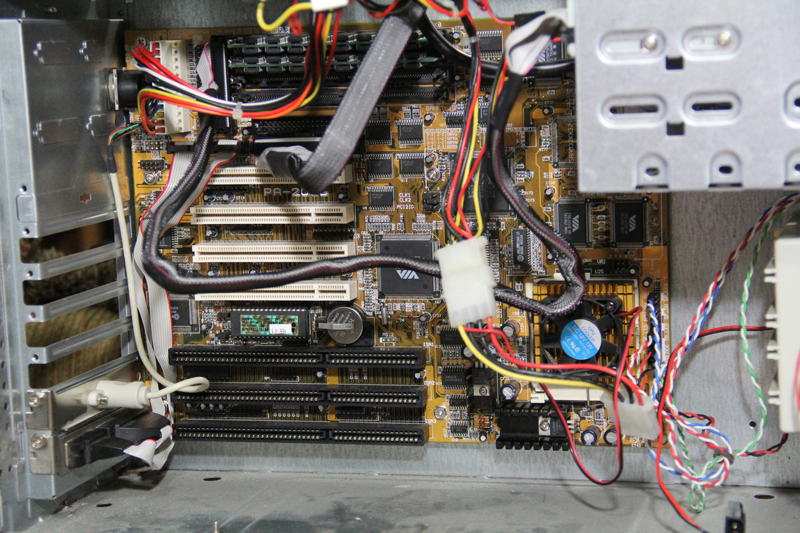
Then into the case it goes, having the PS/2 mouse port and serial ports hooked up and mounted on the lower slots. I wanted to help keep the wires neatly tucked away, and this seemed quite ideal:
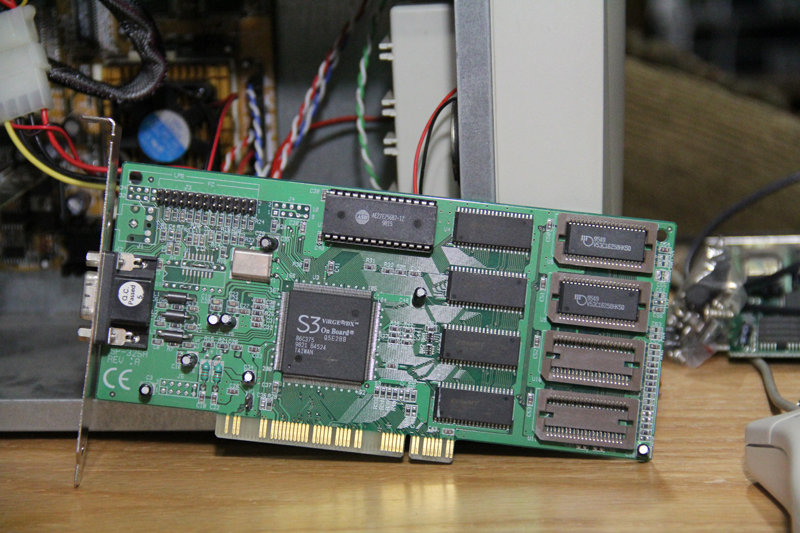
Then I decided to choose an S3 Virge DX video card, which came with 2MB of VRAM, however I added a couple of RAM chips I stole from my Mach64 (Since I think it may be a dead card.). So I think this may be 3 megs total on this S3 now, if I were to guess…
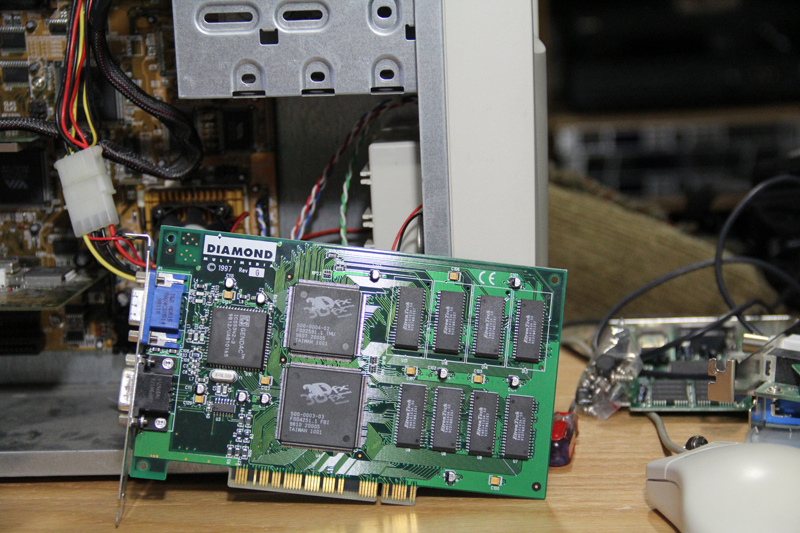
Then next up, is my Diamond Multimedia Voodoo 3DFX card, I was going to put a Voodoo 2 in, but I decided to go ahead and put this one in instead:
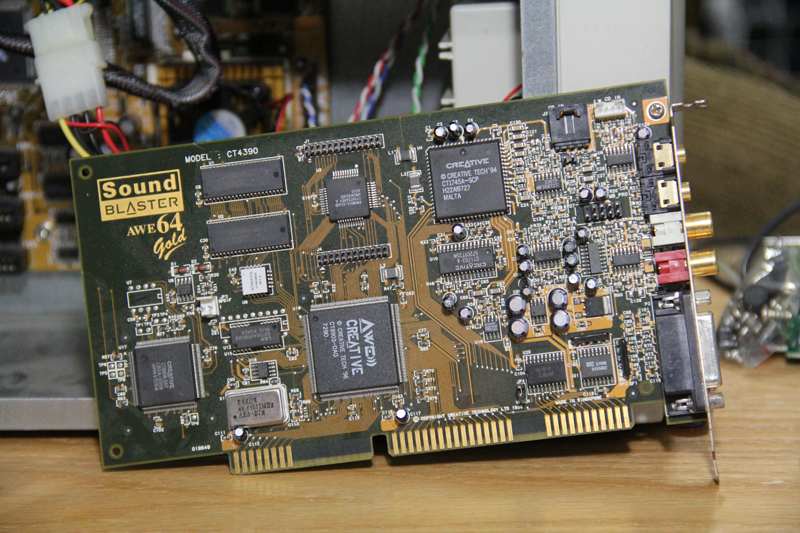
As for my audio, I went with a Soundblaster AWE64 Gold, I have. This one I don’t have an add on SimmCon memory module like I do for my 486 DX4 system, but I don’t think I will worry about it for now:
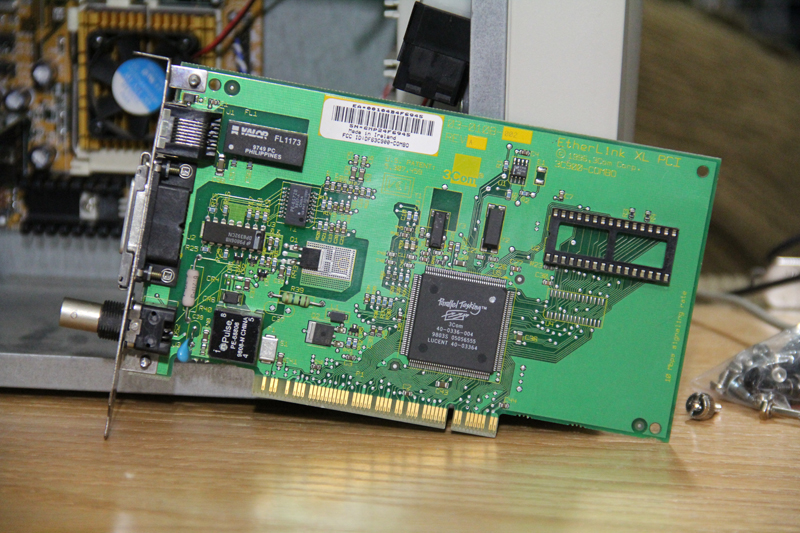
Then I wanted to use an NIC here, as well, which is a 3Com EtherLink XL PCI – 3C900-COMBO:
Then all the goodies installed, and some wire management done:
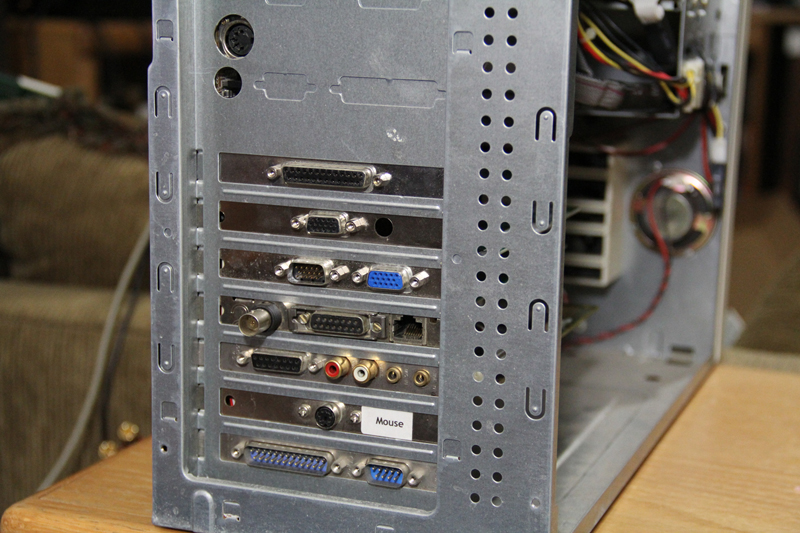
How it looks on the back side:
Then going through some trial and error, which I never fully figured out why, but I ended up having some difficulty with my CD drivers loading, hanging on me after I seem to update the autoexec file, whether by memmaker or adding my mouse driver. Sometimes it seems like it started after I install my 3Com drivers, but after I managed to get things through with memmaker, and me leaving things alone, it won’t hang while trying to load the current CD drive. It had been more of a pain with a DVD drive I had that originally worked until I did a fresh install of MS-DOS 6.22. I don’t know if there’s some conflict going on or what, but right now it seems fine. 😮
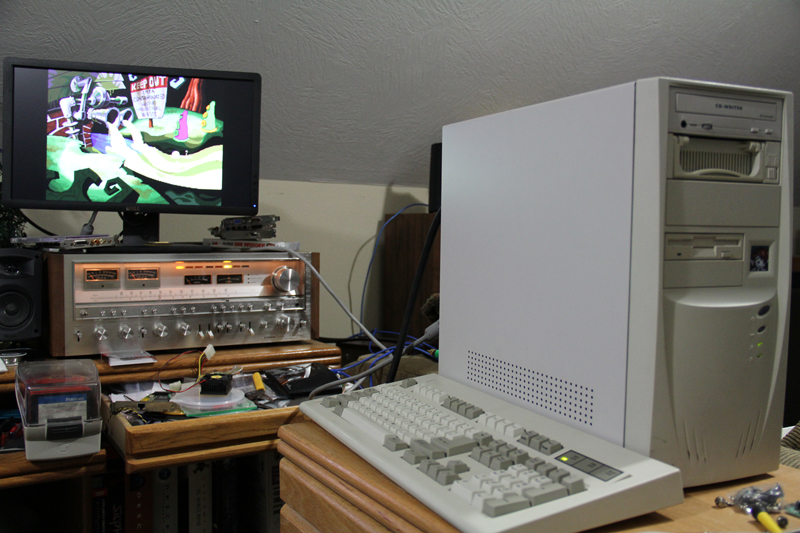
Anyway, here’s the system running Day of the Tentacle from the CD drive!:
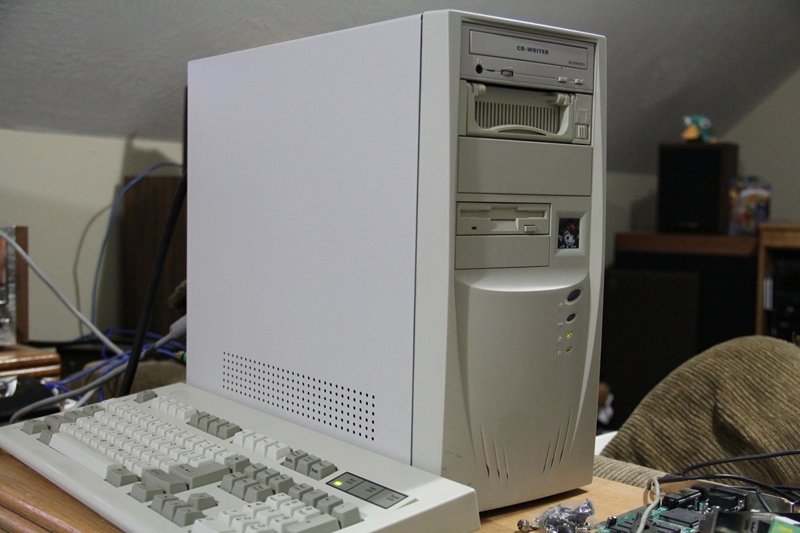
Then a picture showing more of the tower itself 🙂 :
Motherboard originally had 32MB of RAM on it, but during testing process, I ended up sticking 64MB in it, and hadn’t changed that. 😀
Specifications:
First International Corp. PA-2005 Motherboard
Intel Pentium 133MHz A80502133 CPU
64MB of 72-Pin SIMM RAM
S3 Virge DX Graphics card
Diamond Multimedia Voodoo 3DFX card
Creative Soundblaster AWE64 Gold ISA audio card.
3Com EtherLink XL PCI – 3C900-COMBO card.
Samsung 3.2GB IDE Harddrive in a 5.25″ removable HDD Bay.
Some CDRW drive I have.
3.5″ Floppy Drive
MS-DOS 6.22 and Windows 3.1.
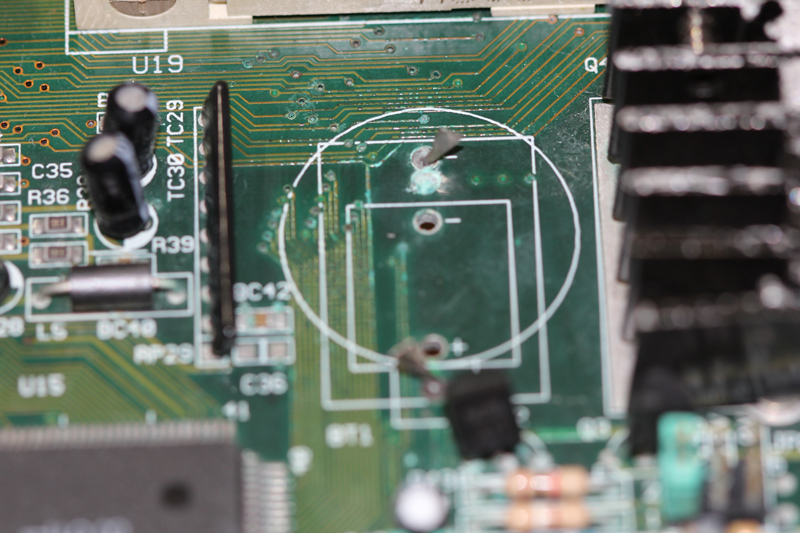
My recent project ended up with me rebuilding my old system, due to the CMOS battery leaking acid, really eating up some traces on the board.
As much as I had hoped to of saved my older motherboard, which was a TMC Research PCI48AF Version 3.0 board, I could not. Here are the traces on the old board…
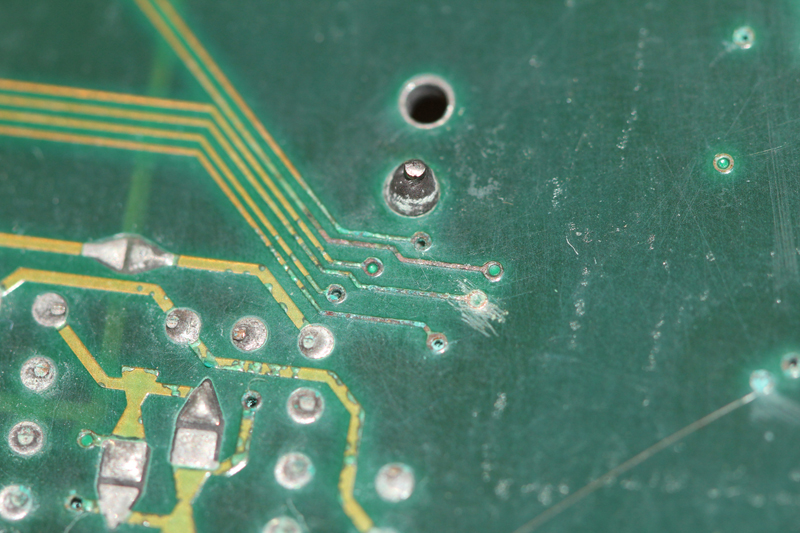
Then the backside:
It looked a lot worse than this, before I cleaned up the corrosion it with vinegar and rubbing alcohol. It had one of those barrel shaped batteries, I would definitely recommend anyone with a classic working system, to be sure to have these changed out. Even if you are in the market for a motherboard, like if you were hunting around online, never overlook the battery, and see what possible mess it may have left. And if it still works, then it’s best to replace the battery immediately and clean up the corrosion. 😉
Now I had been using a AM5x86 CPU, which ran at 133MHz in here, as well as a ATI Rage LT Pro AGP 8MB PCI graphics card. Along with 32MB of RAM and 256k cache. I miss that old configuration…
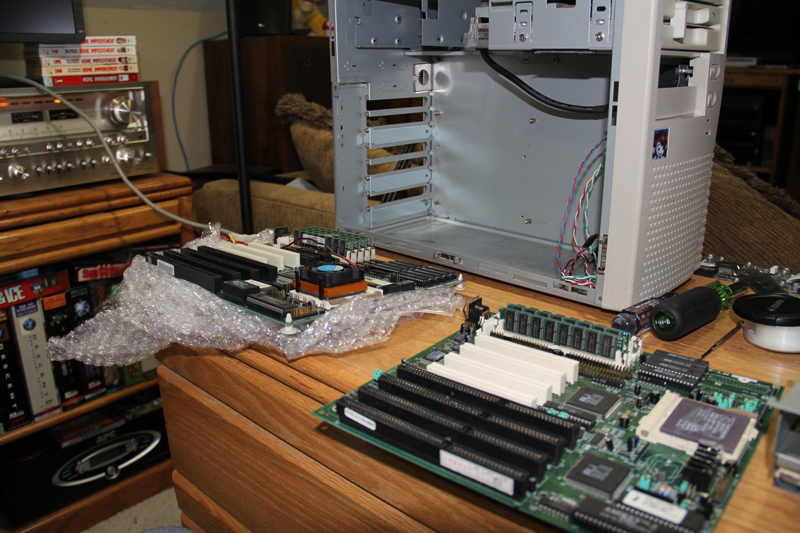
However my next step was to find another motherboard, and fortunately, one came up, which is an Elitegroup Computer Systems, UM8810P-AIO. Which had a nice AMD DX4 100Mhz processor, and 64MB of DRAM. 256k of onboard cache. Which turned out to be pretty sweet, even came with an S3 Trio64 GPU.
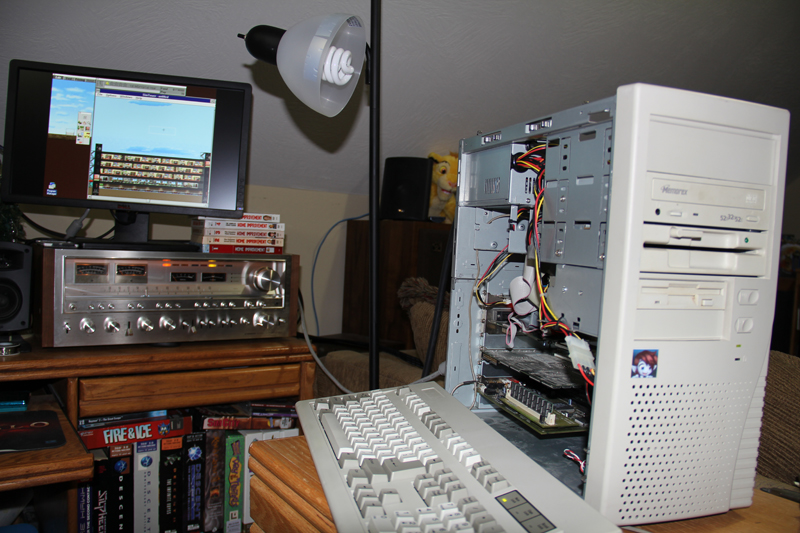
So let the build begin! First picture shows both motherboards, UM8810P-AIO on the left and the PCI48AF on the right.
After getting all the components installed I decide to work on a little bit of wire management.
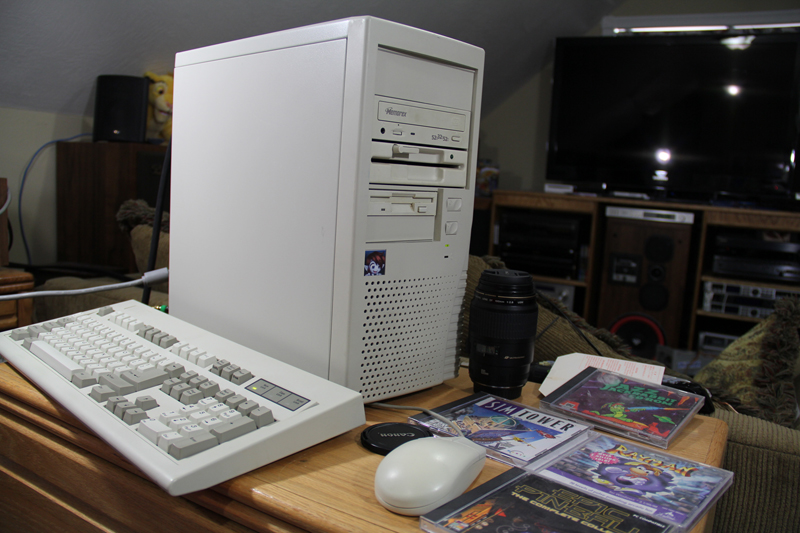
Then here I have it running Sim Tower, in Windows 3.1. 🙂
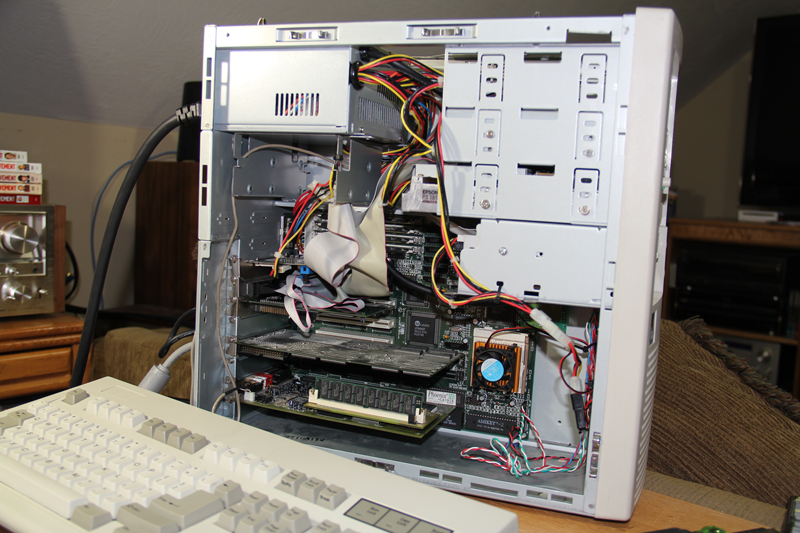
I then decided, that it’s complete, after having the video drivers installed in Windows 3.1, and everything in good working order, I can finally close up the case. 😀
I was originally going to put my ATI Mach64 in, but nothing would display on the monitor, the system would boot as it does, with out any output… but the S3 Trio64 works pretty well, so I can’t complain. The main reason from straying away from the ATI Rage LT Pro card I had in it with the older motherboard, was due to Commander King 4 having compatibility issues with it. Mainly with the rough horizontal scrolling in the game. Not an issue to worry about with the S3. 🙂
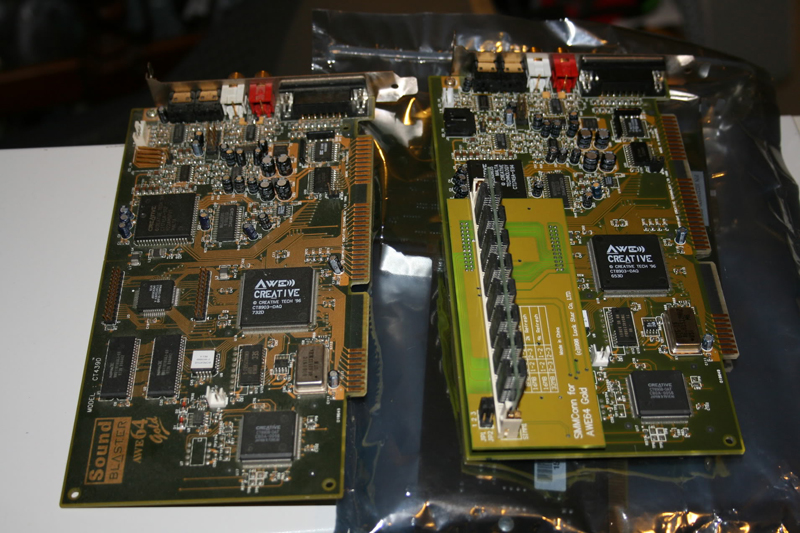
Also for anyone curious about the 72-pin SIMM RAM on the audio card, this is a SimmConn memory adapter with a 32MB SIMM installed. Expanding the memory on the Sound Blaster AWE64 Gold audio card, however, the card is limited to 28MB max total. Great for loading sound fonts. 🙂
Here’s a picture comparing two of the same card, one with and one with out the SimmConn module:
Rear view of the tower:
System Specifications:
AMD 486 DX4 at 100MHz
ELITEGROUP COMPUTER SYSTEMS, INC. UM8810P-AIO motherboard (Capable of 128MB of RAM, max!)
64MB DRAM + 256K Cache
S3 Trio64 86C764 PCI Graphics card. Not sure on VRAM amount.
3DFX Voodoo 2 3D Acceleration Card
Sound Blaster AWE64 Gold with Add-On SIMMConn Memory Adapter expanding the audio RAM up to 28MB!
2GB Transcend Compact Flash Card in place of a Harddrive, using a Syba Compact Flash to IDE adapter, that mounts in the rear brackets.
Memorex 52x CD-ROM/CD-RW Optical Drive.
3.5″ 1.44MB Floppy Disk Drive.
5.25″ 1.2MB Floppy Disk Drive.
MS-DOS 6.22 and Windows 3.1 with all the appropriate drivers installed.


